WAP Help and User Guide – Installation For Sage 200 v20
This document will guide you through installing Sicon WAP onto a server, configuring email if required, and connecting to a Sage 200 Database.
Search the page by pressing Ctrl + F (windows) or CMD +F (Mac) on your keyboard.
Back to all user guidesProduct overview
1. Basic Installation – Sage 200
This document will guide you through installing Sicon WAP onto a server, configuring email if required and connecting to a Sage 200 Database.
1.1. Prerequisites & Recommendations
Before attempting to install Sicon WAP, please ensure the following prerequisites are fulfilled. N.B. if Sage 200 Server is installed, most of these prerequisites will be met.
Please Note
For Sage 2013 and above; an Active Directory service account needs to be created specifically for WAP. This account may need to be created by the relevant IT responsibility. Please refer to section 2.1 Creating AD User.
Server
Windows Server 2008 R2 or above is now the minimum level of operating system; 4GB RAM or greater recommended. Web Server and Application Server are installed.
IIS: All common HTTP features are installed, such as Static Content, ASP.NET and Windows Authentication should also be installed.
.NET Framework 4.7.2 or later.
Sage 200 Client: Version 2011 Service Pack 1 or later installed (Service Pack 5 will *REQUIRE* the Sage Hotfix for Bug 5095 installed).
SQL Server: An available SQL server 2005 or later is available with sufficient access rights.
Documents: Existing local folder where WAP can save documents to; e.g. C:\Sage\WAPDocs or E:\Sage\WAPDocs.
If POP Posting is required for Requisitions, Auto Generate Order Return numbers must be turned on in Sage 200.
If SOP Posting is required for Sales Orders, Auto Generate Order Return numbers must be turned on in Sage 200.
3rd Party Integration enabled in Sage 200 (for WAP Add-on package).
Clients
Microsoft Internet Explorer 9 or greater. There are a few things in WAP that have been identified as Internet Explorer 8 related bugs; most of the system will work but there may be a few things we have investigated as Support that didn’t work due to IE8 (one example being an increasing memory usage bug).
2GB RAM or greater. The order page can take up quite a bit of memory client side; Windows uses 1-2GB, so a system with 2GB RAM will already be using most of the RAM so we would recommend having 1GB spare. WAP will work without it as memory is paged to disk, but it would not run as quickly as on machines with more RAM.
2GHz processor or greater.
JavaScript enabled.
Popups enabled for WAP server address.
Minimum 1024×768 resolution.
2. Installing WAP
2.1. Creating AD User
This must be complete prior to a WAP install taking place.
An Active Directory service account need to be created specifically for WAP, by the IT resource prior to the WAP installation taking place. The Windows user account is required if the web server is not the Sage server, otherwise a local account can be created on the web server with Admin rights to the local machine. An Active Directory account is required for 2013 and above and split server installs; in Sage 2011 a standard Sage account can be created. Below a new local user “WAP” is being created; make sure this user’s password is set to never expire.
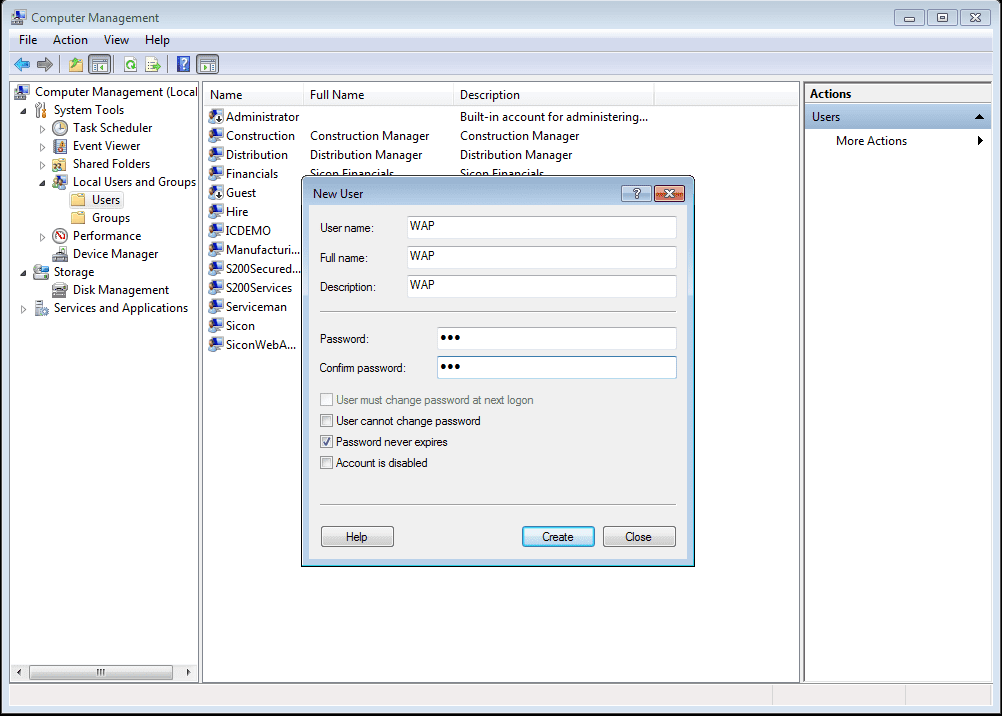
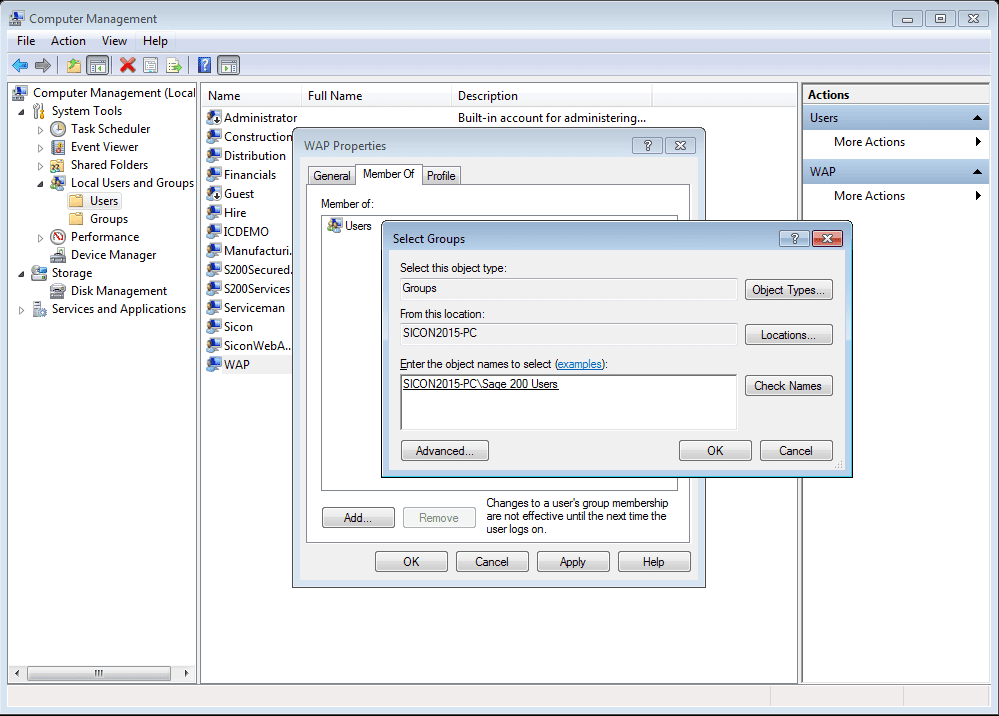
Link this user through to the ‘Sage 200 Users’ and ‘Local Administrators’ Active Directory security groups.
2.2. Linking Service User to Sage System Admin
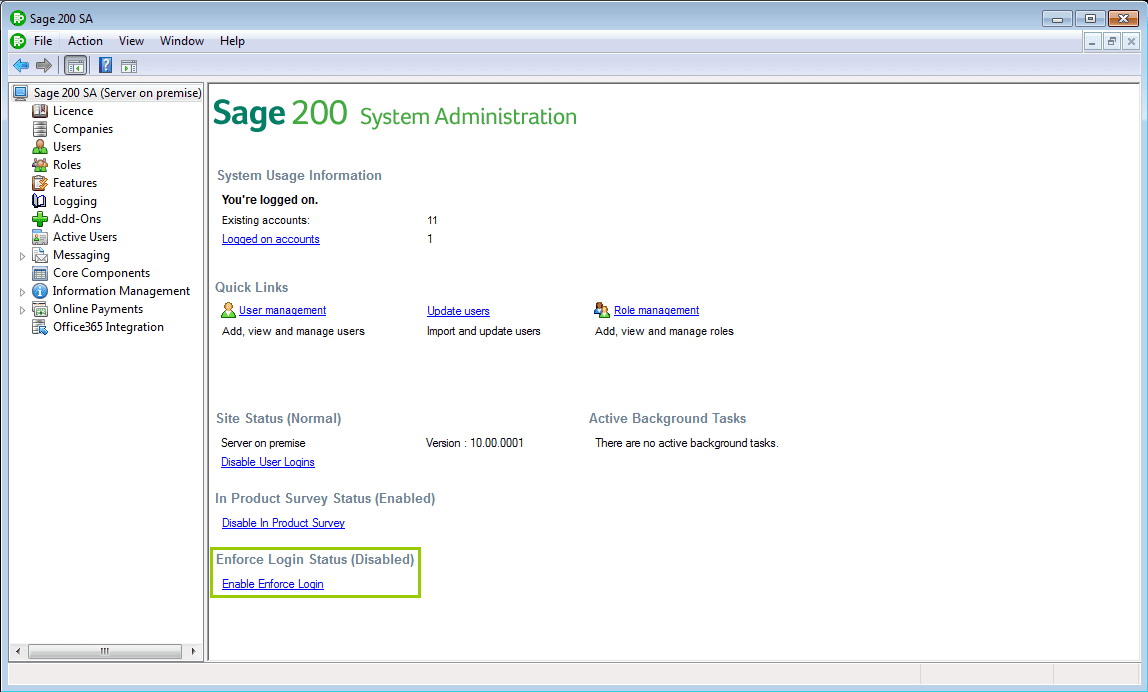
Open Sage System Admin and link the above user through.
Make sure that in System Admin ‘Enforce Login Status’ is not enabled.
Create a new role “WAP” which has remote users access only; this will ensure the user does not take up a Sage licence when running the WAP service. The only user in this role should be the WAP user which should belong to no other roles.
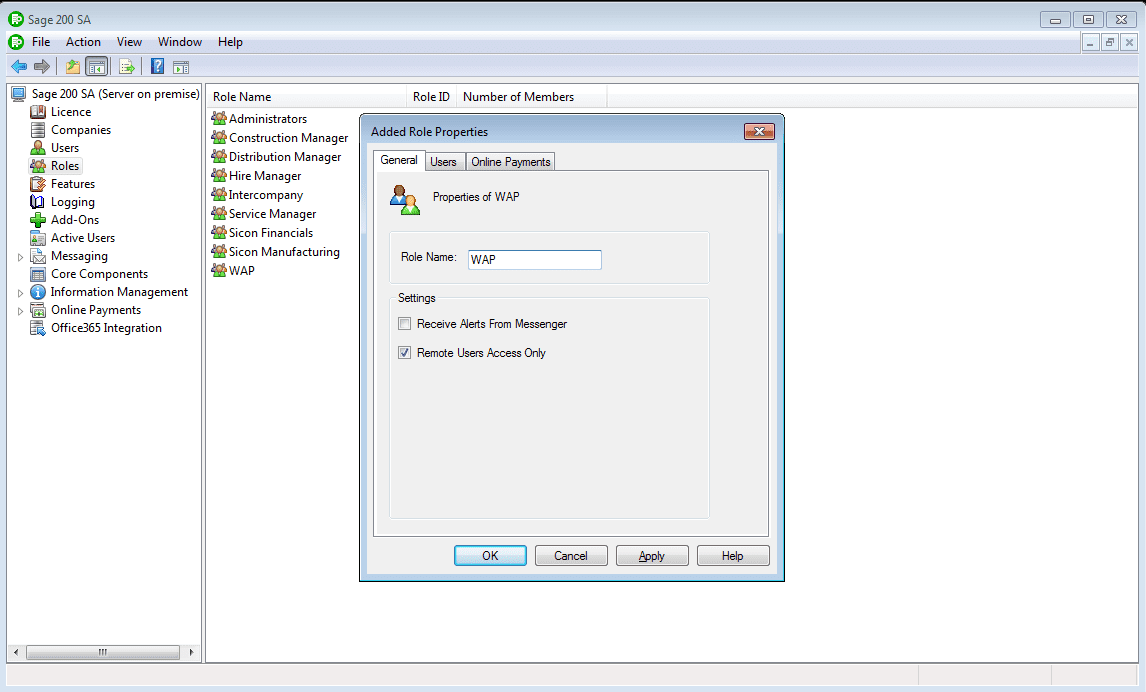
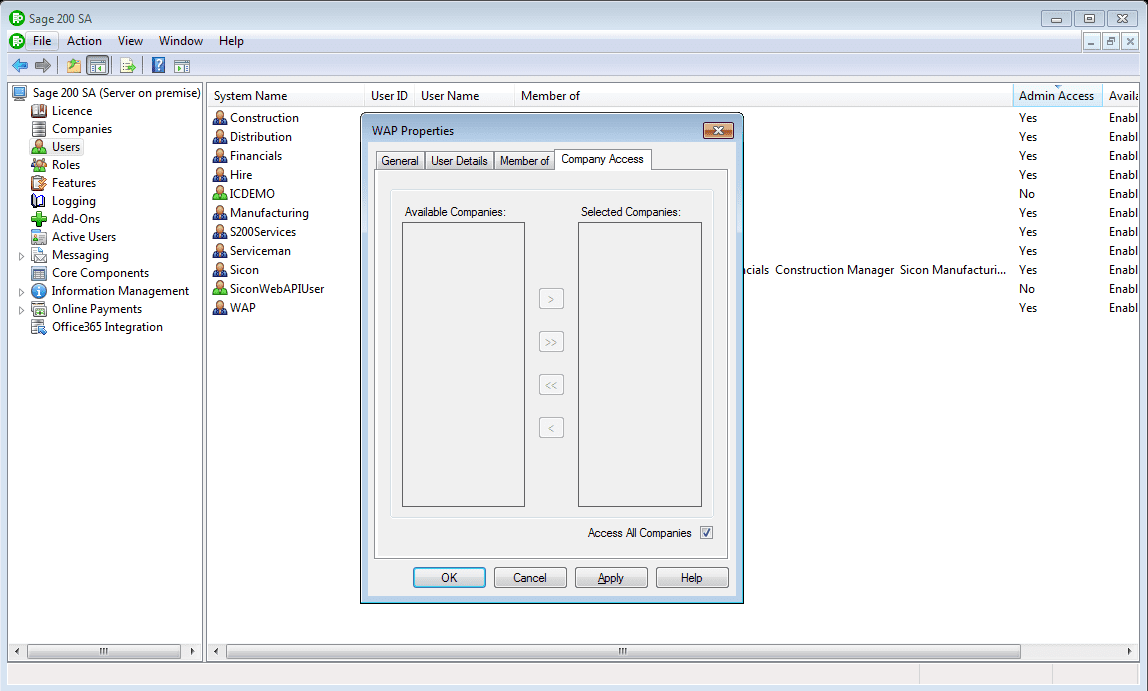
Make sure this user has access to all companies.
2.3. Installing WAP Add-On
Once WAP is installed, the WAP Add-on will need to be added into Sage System Admin; this provides additional features and analysis in Sage 200 when used in conjunction with the Sicon WAP product.
In Sage System Administration, locate the Add-Ons section, right click and choose to add a new add-on.
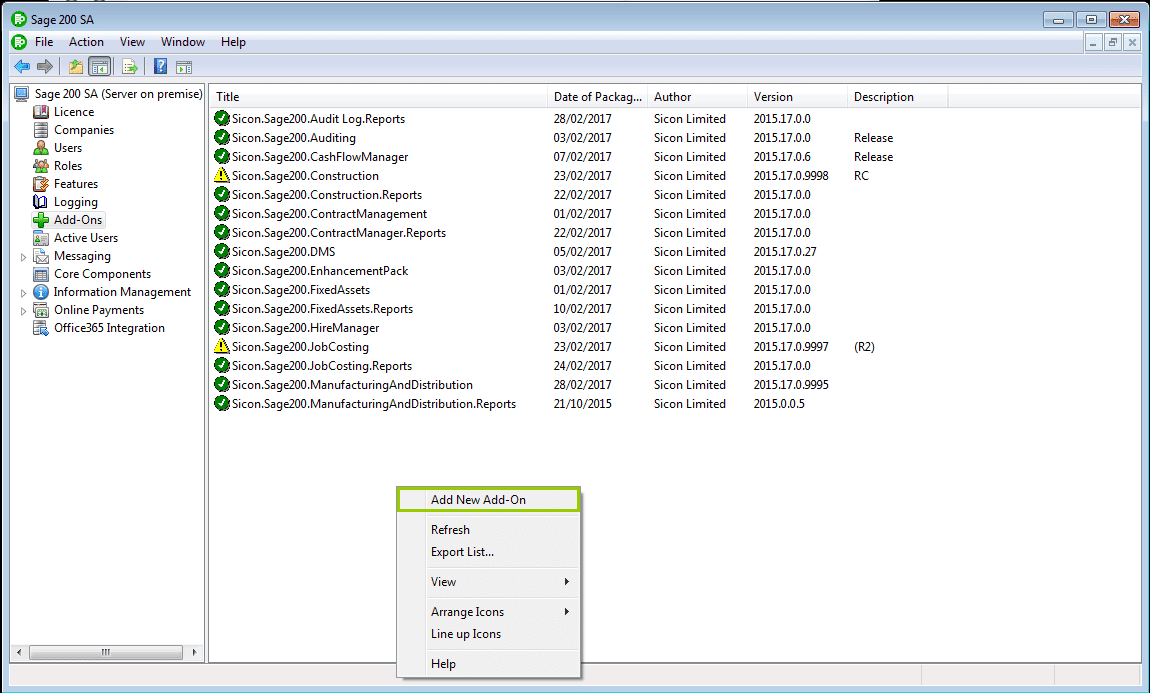
Choose the simple mode and click next to proceed.

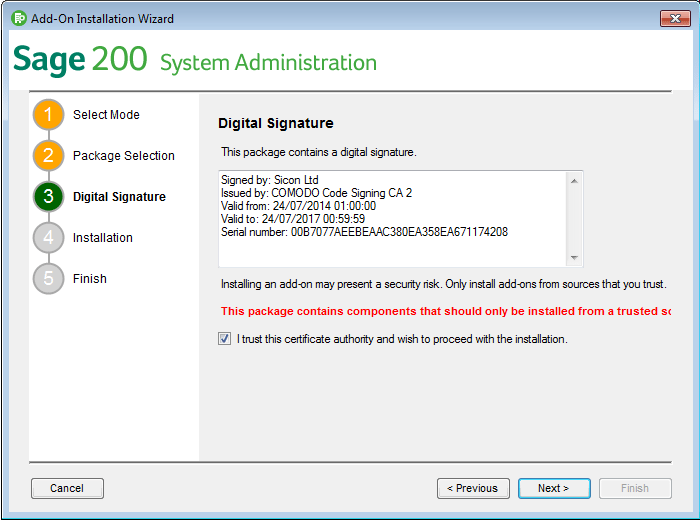
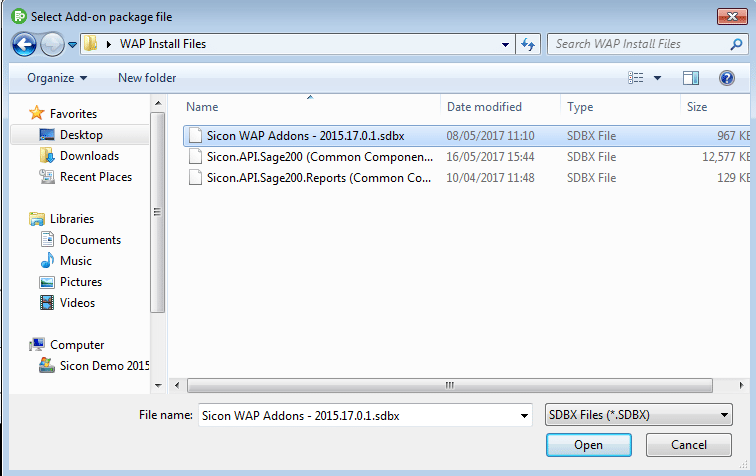
Find the ‘Sicon WAP Addons.sdbx’ file from the Install forms, select, open and continue the wizard.

Agree to trust the certificate authority and continue the wizard.
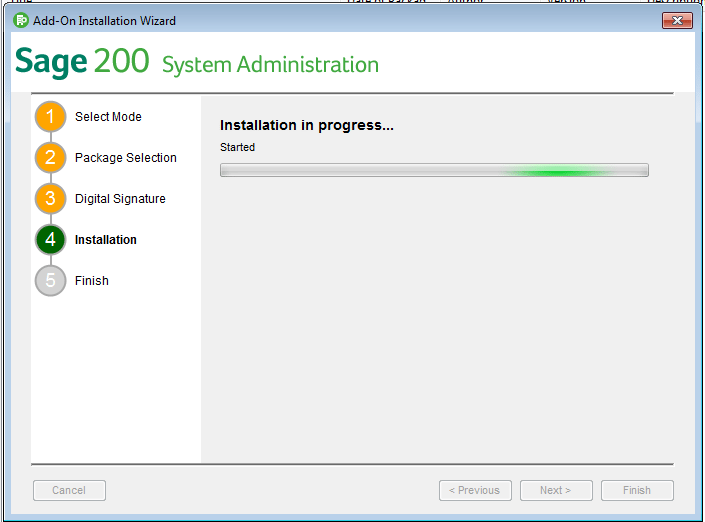
The install will then commence.
Repeat this process for Common Components and Common Reports. Once these have both been installed, update all Companies.
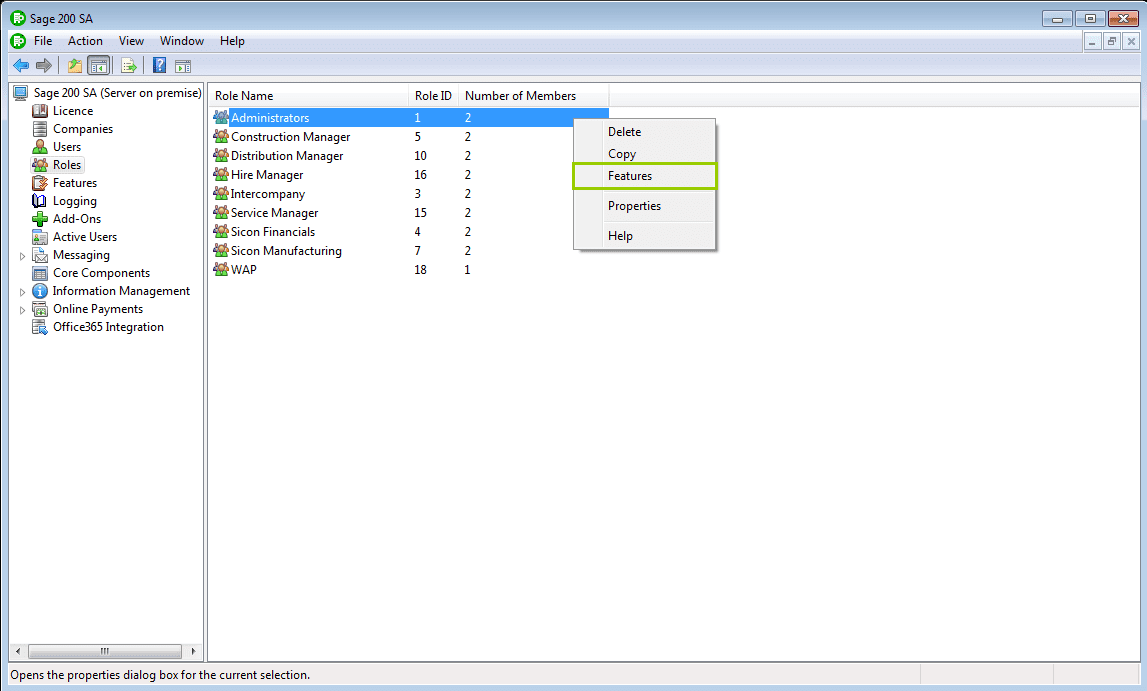
Next, choose a user or admin role to assign the extra Sage features to; it is recommended that at least the ‘Administrators’ role is assigned these features initially. Right click on a Role, choose Features.
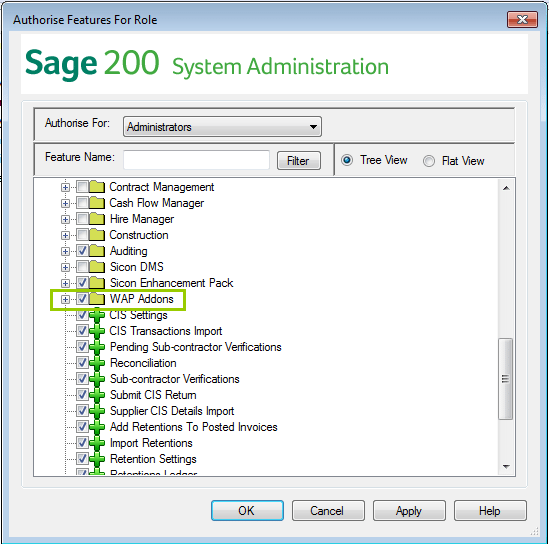
Locate and select the WAP Add-ons tick box and click OK. Please see the Sicon WAP Add-on Help and User Guide for more information on the features of this add-on.
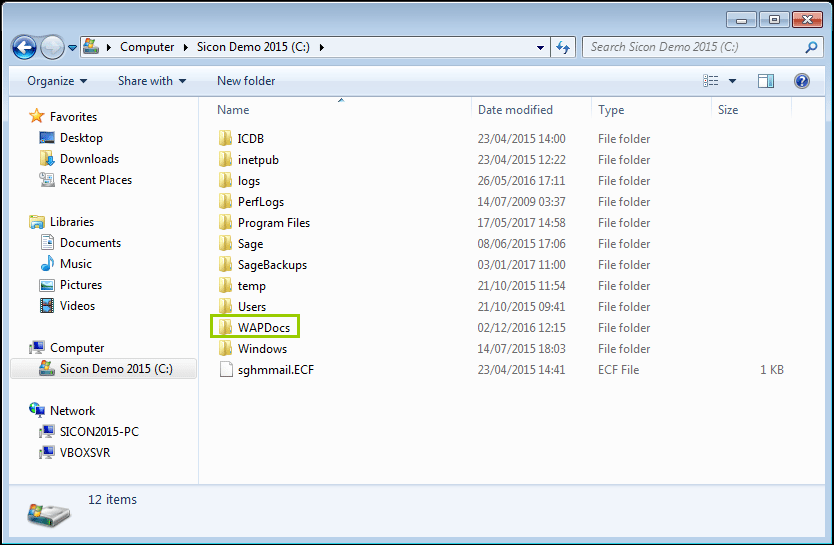
2.4. Creating Folder for WAP Documents
Create a new folder for WAP to save documents to if not already done. This needs to be on the server with the data drive; make sure this is a local folder the WAP user has access to. This would usually either be created as C:\Sage\WAPDocs or E:\Sage\WAPDocs.
2.5. Installing the WAP Web Application
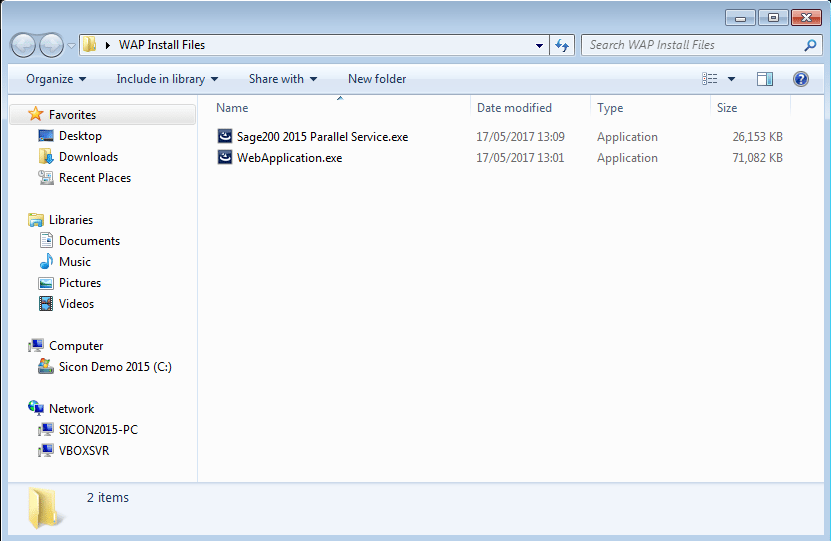
Download and unzip the install files to an accessible location, such as a folder on the desktop. Run the webapplication.exe installer.
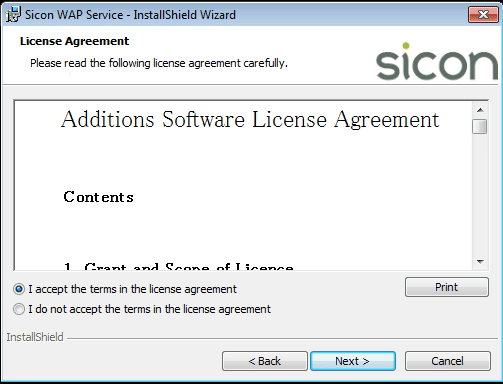
Press next upon accepting the Sicon License agreement.

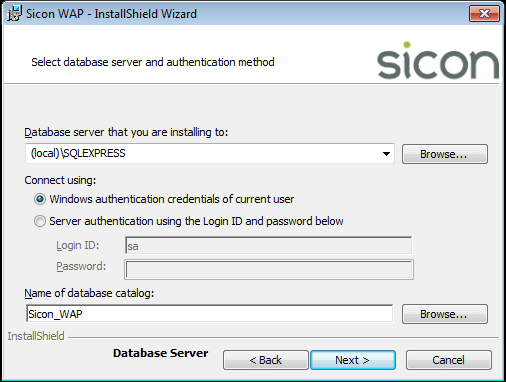
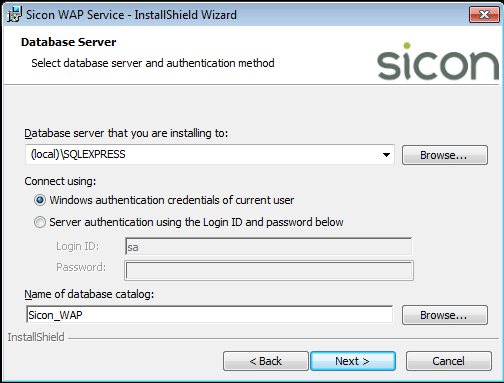
The next step will be to select the SQL database to host the WAP database – this does not have to be on the same server as the Sage data. The authentication method here is only used to install and configure the database. Click Next to proceed.
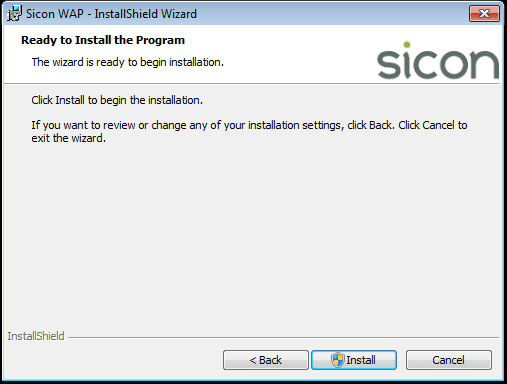
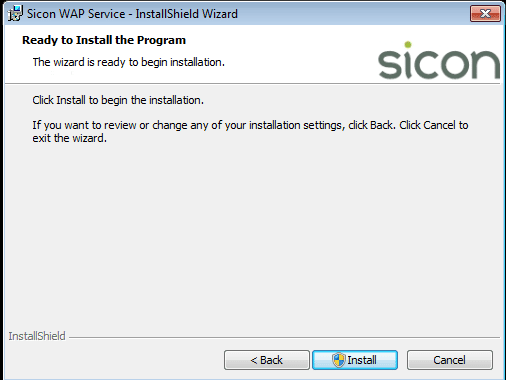
Press Install to complete installing WAP using the settings provided and once complete, press Finish to close the installer.
2.6. Running Initial WAP Wizard
Once the Web Application has been run, navigate to the WAP website (the webpage should be localhost/WAP). N.B. loading this page for the first time can take a long time to load initially. The only user configured will be the Admin user.

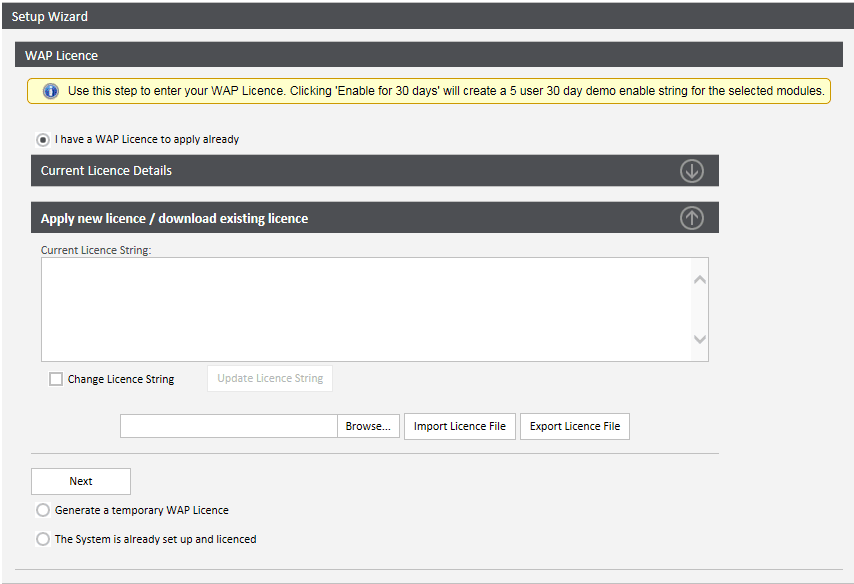
Enter an enable string if one has been issued, or enter a temporary 30 day trial string. N.B. make sure to select all the required modules here as they cannot be selected later, unless a new temporary string is provided by Sicon.
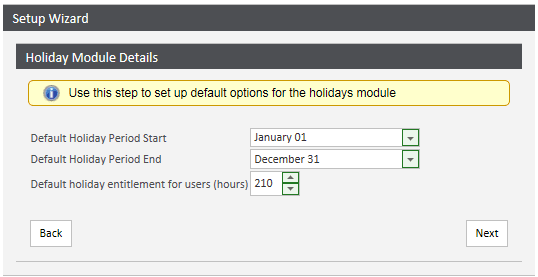
If the Holidays module has been applied, enter the default holiday period start and end date and default entitlement (in hours).
Next configure the link that will appear on WAP emails; it is important not to user ‘localhost’ or 127.0.0.1 as this will not work. This web link can be changed later if unsure. Enter the local path for WAP to store documents (as set up as part of previous step). Check to ensure WAP can access this folder.

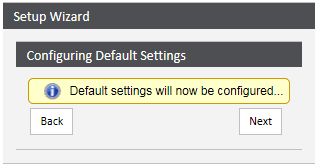
The default System Settings will be configured (i.e. default approval configuration etc.).
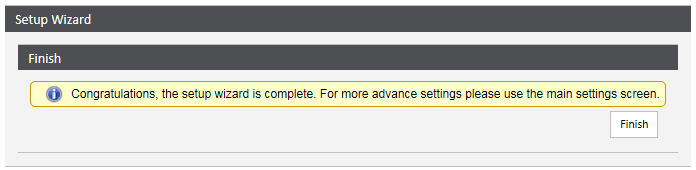
The wizard will now be finished.
2.7. Linking a Sage Database to WAP
WAP will work across multiple companies but must be linked to one company to allow for further configuration.

Add a new database connection; enter the details of the company to add. Copy the Company Description from Sage System Administration, the WAP username and password will be the user details created initially and choose the SQL server and database the company belongs to. Leave the Integrated Security empty and the leave the SQL Username and Password as the default.

Ensure under the Settings tab a default standard and zero tax rate have been configured. The Sage database cannot be saved until this is done.
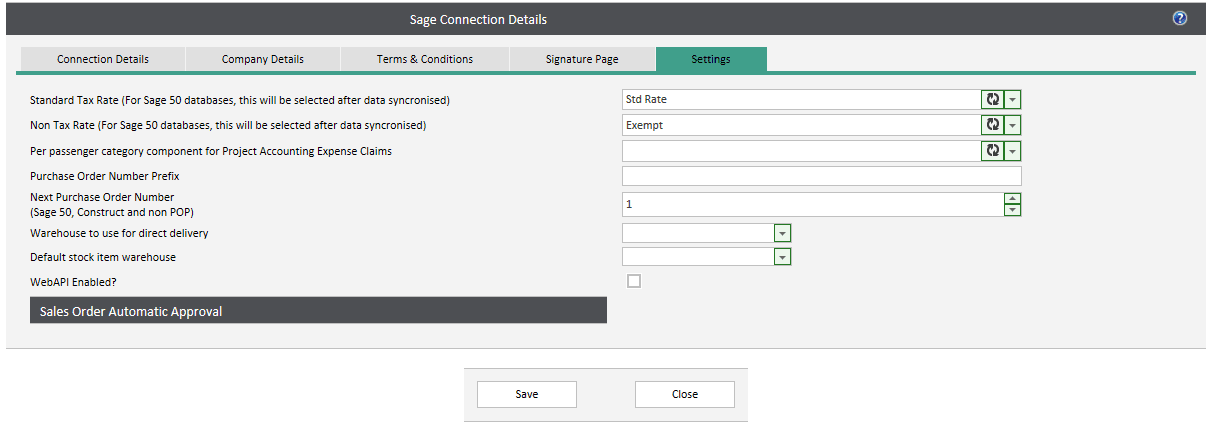
Once this is done, this completes the basic installation of WAP ready for the configuration of users, approval routes and any other enabled modules.
2.8. Log into Sage as the WAP User
In order for WAP and Sage to link together correctly, make sure to log into Sage as the WAP user once on the computer that will have the WAP service installed on.

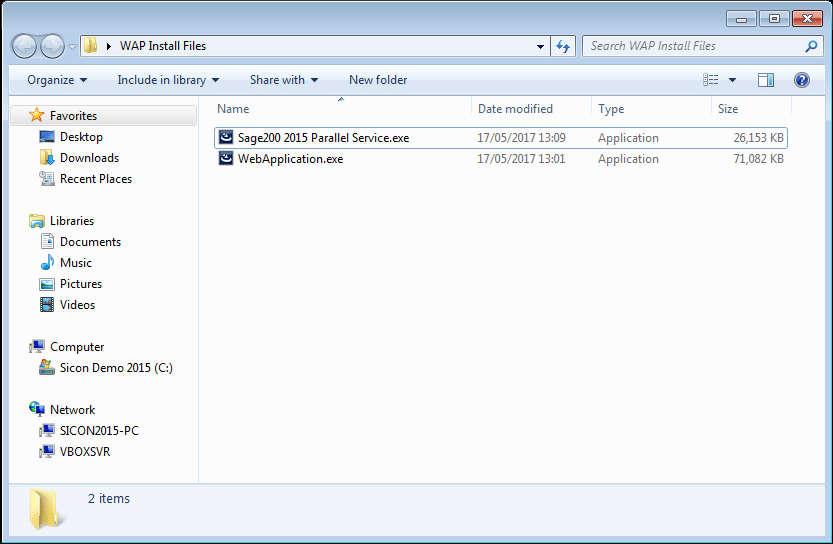
2.9. Installing the WAP Service
From the folder with the install files, run the Service installer.
Press next upon accepting the Sicon License agreement.
Enter the same SQL details as used for the initial WAP installation. Click Next to proceed.
Enter the details of the WAP user created previously. Click Next to proceed.

Complete installation.
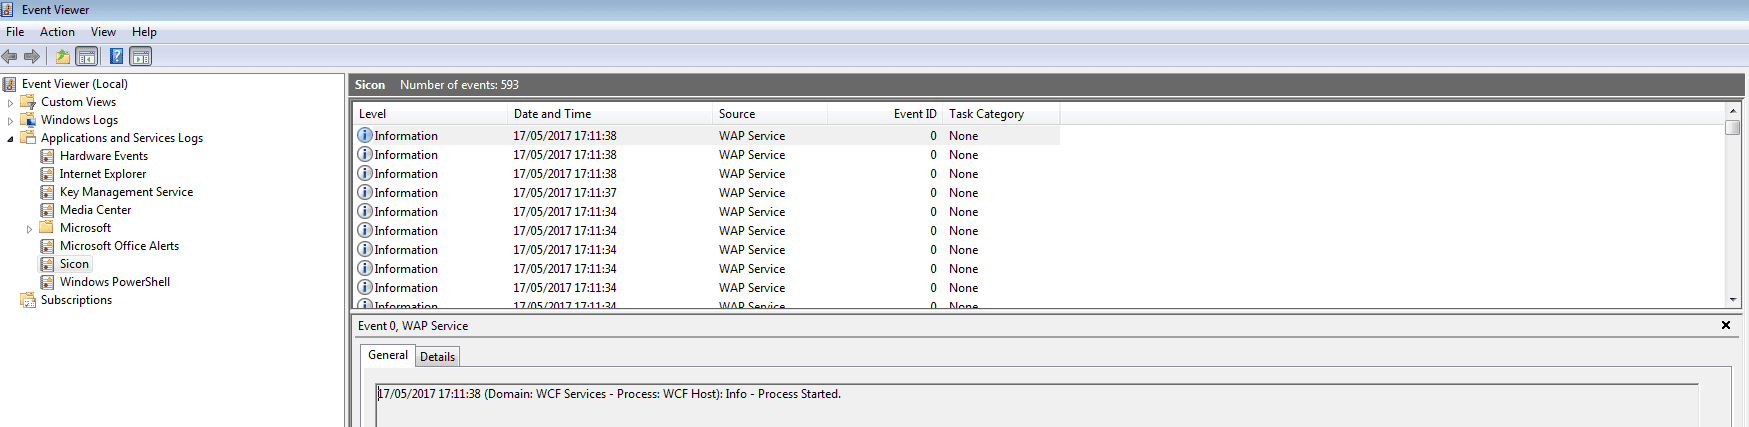
Once the install is complete, the WAP Service must be started through Services.
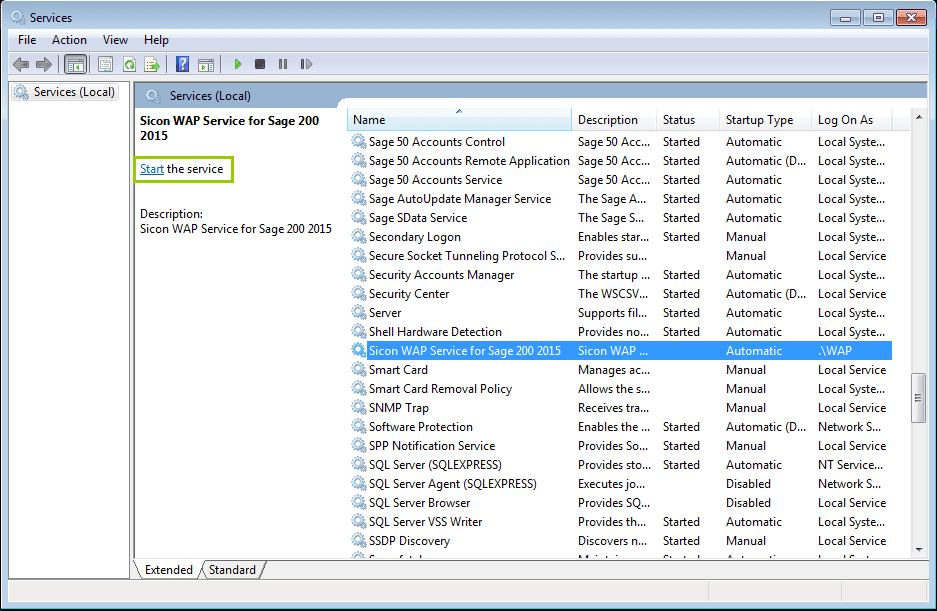
Once started, check the Event Viewer to make sure there are no errors being logged.