Self Service Help and User Guide
Self Service Help and User Guide will take you through the features and settings for the Sicon Self Service module for Sage 200.
Search the page by pressing Ctrl + F (windows) or CMD +F (Mac) on your keyboard.
Back to all user guidesProduct overview
Help and User Guide maintained for Sicon Self Service version 221.0.0 and Upwards
The Sicon Self Service Help and User Guide will take you through the features and settings for the Sicon Self Service module. It is designed to allow the creation and tracking of service calls from the web browser login by the end user customer and dynamically updates to the service desk for scheduling and billing.
1. Menu (Configured within Sage 200)
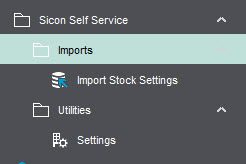
1.1. Imports
Imports – if you are using Service Fault Codes, this import file will let you create ‘friendly’ names for the already configured fault codes so the customers can easily identify which one to choose. The Friendly name has been added as a lot of users have stock descriptions that are not meaningful to their customers, this is stored against the stock code in Sage:

To import create the import files, click Example Import File Button.

2 xlsx files are generated, one with the compulsory fields and one showing the examples.

Populate the file and save as a CSV file.
Find the file (if it is not a CSV file you will not see it to select).
Check File if there are no errors, the import button at the bottom left-hand side of the screen will be active, click to Import.
1.2. Settings
Settings – A default Case Type needs to be selected. These are created in Service, Maintain Case Types. For more information please see the Sicon Service Help & User Guide.
A default Tracking Status also needs to be linked in the Self Service settings, this is done in Service Maintain Tracking Status and needs to be ticked as available to customers. For more information, please see the Sicon Service Help & User Guide.
If you are not using the Service fault codes you will need to untick this option.
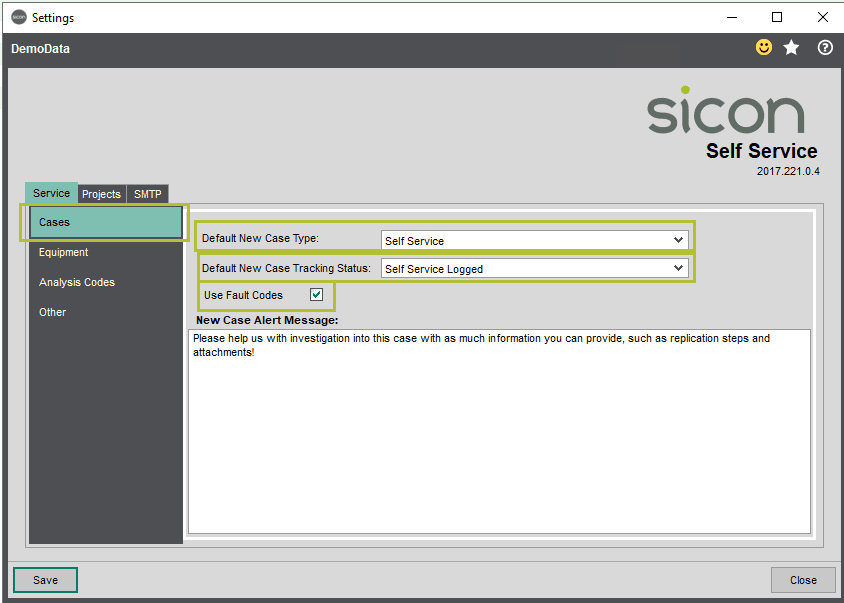
The New Case Alert Message is configurable; this is set as an example.
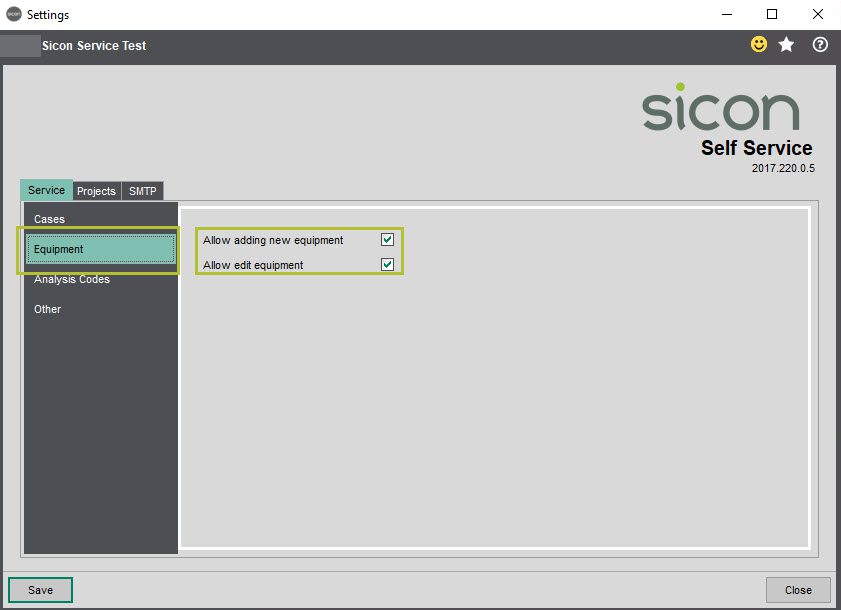
If you want your customer to be able to add New Equipment records to the system on the Equipment tab tick to Allow adding new equipment. If you also want them to be able to amend/edit their equipment records tick to Allow edit equipment.
Where you prefer to control this yourselves leave these options unticked.
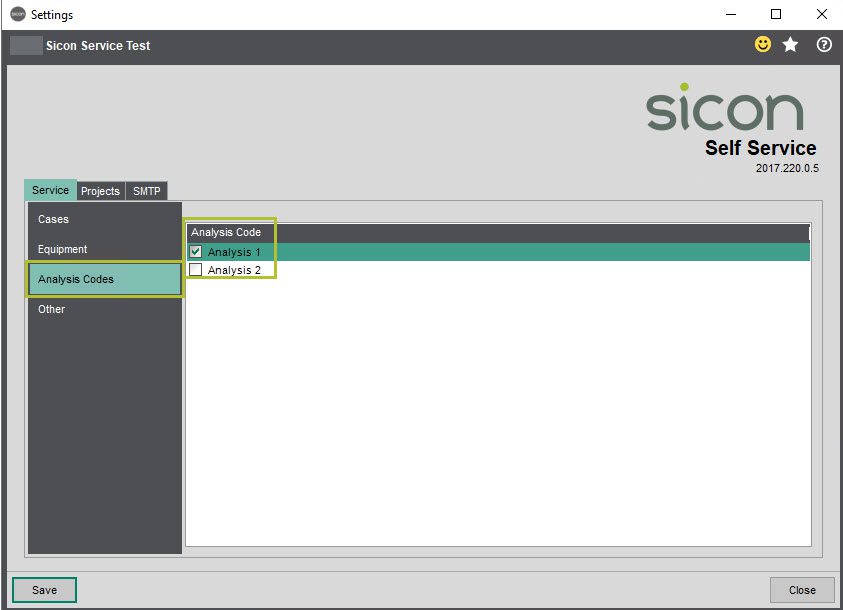
If you have a requirement to capture additional analysis details, this will need to be configured in the Service Settings, Analysis tab. For more information, please see the Sicon Service Help & User Guide.
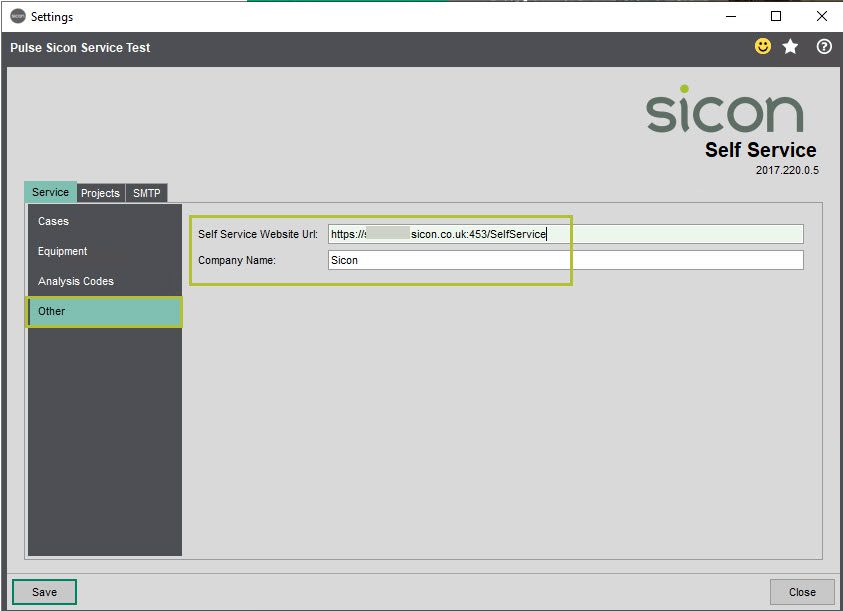
The Other menu option is to store the URL for logging on to Self Service and to define the company name.
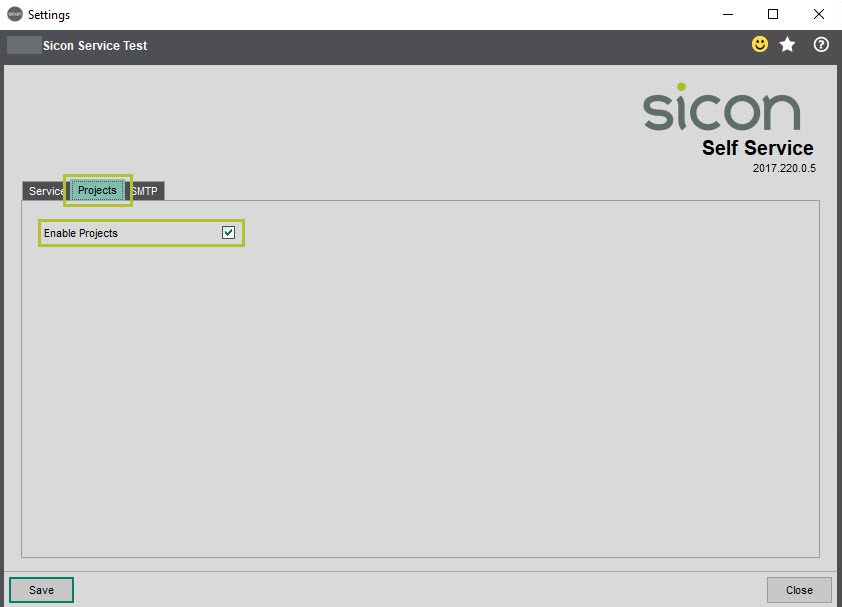
Projects are not enabled for the Self Service portal by default, if you want your customers to see their project details this will need to be ticked.
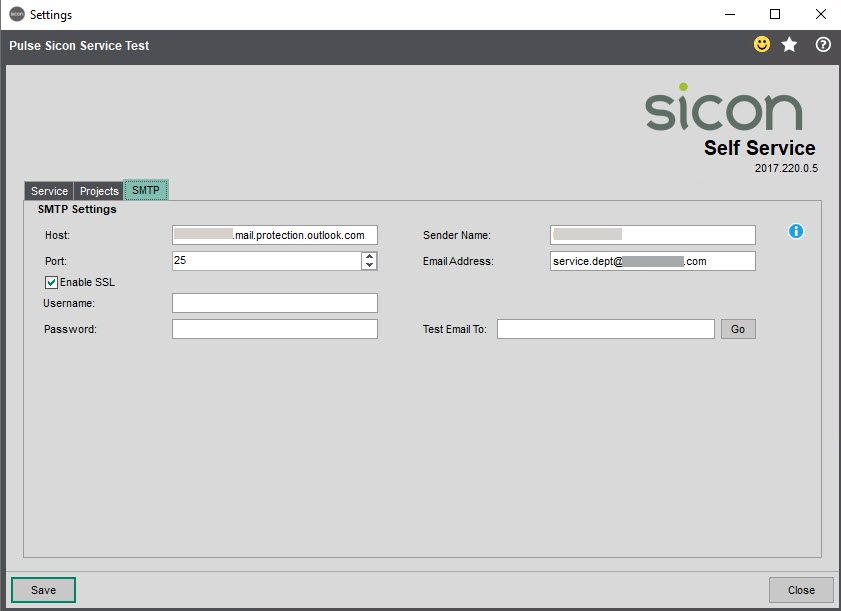
The SMTP tab settings are to define the e-mail sending name and address and is also used to enable the re-setting of passwords by the end user.
Note: These settings are shared with other Sicon Modules.
Enable SSL sends emails securely using SSL, the companies I.T. department will be able to confirm if this is required.
Self Service access is setup on the Sales Ledger Account.
Amend the customer account and on the Contacts tab click Add to enter a new contact (or Edit to amend an existing one).
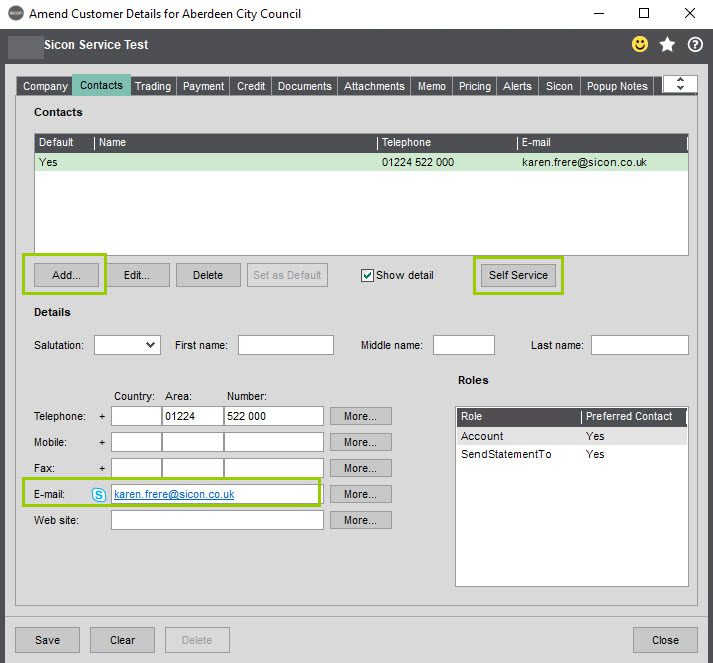
We are using the E-mail address to create the login to the Self Service portal.
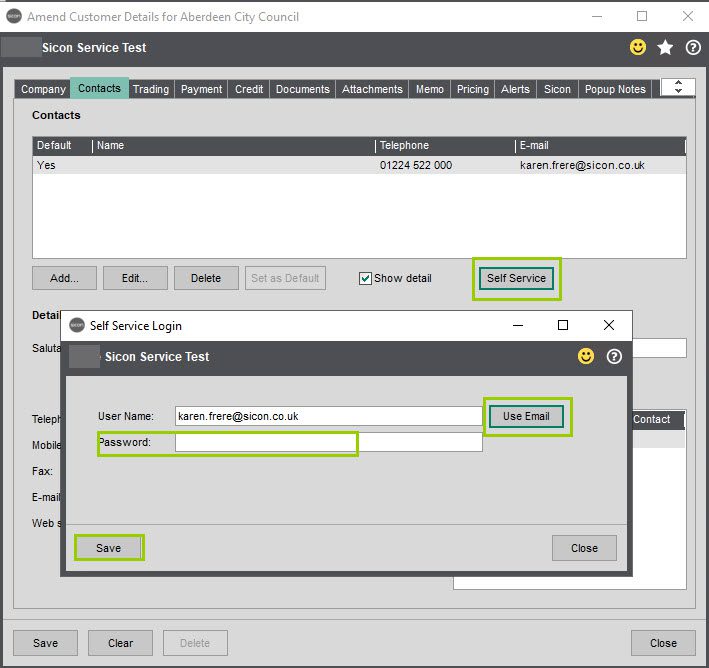
Click the Self Service button to configure the user login details.
Click Use Email button to populate the username with the customer’s e-mail.
Enter a Password and Save. Note: that the password has a complexity requirement:

Enter the URL in a web browser to see the login screen for Self Service.
2. Web Browser
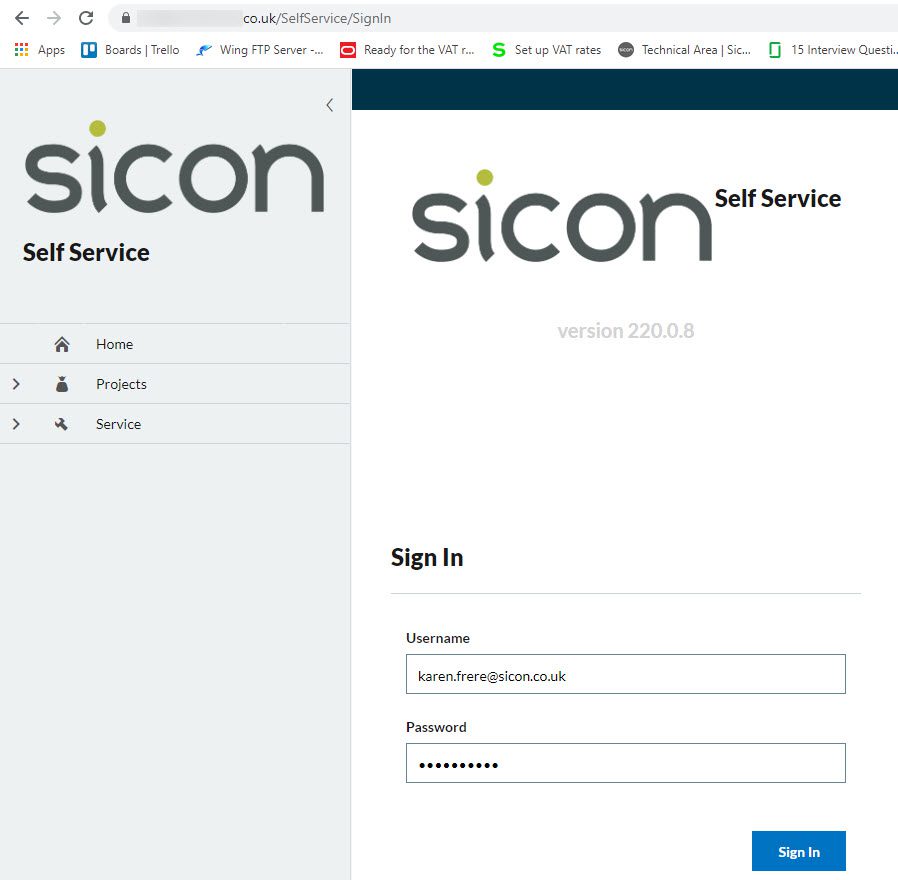
Username: This is the e-mail address that has been setup on the Sales Ledger account.
Password: as per the sales ledger contact.
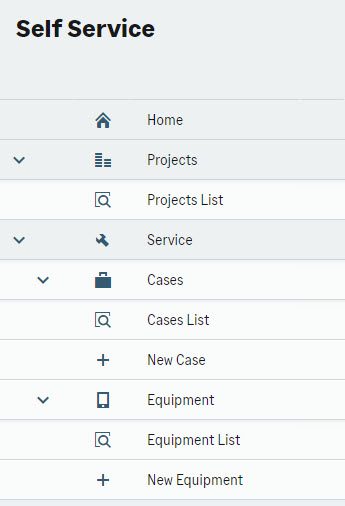
When logged in you will see 3 icons on the left-hand menu (if you have enabled projects in the Self Service settings)
- Home: Shows the list of available modules, i.e. Projects and Service.
- Projects: Will only show access to the projects assigned to the customer account when you click the Projects List icon.
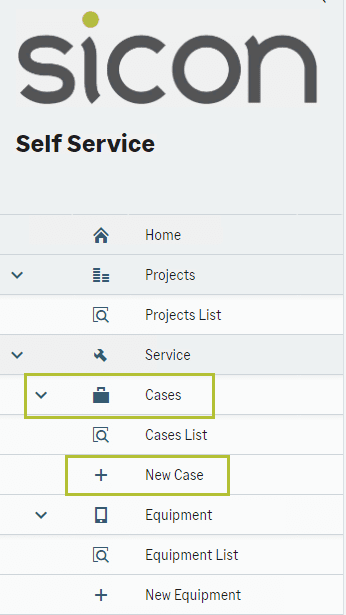
- Service:
- Cases:
- Case List: Displays the list of active cases for the customer.
- New Cases: Enables the entry of a new case.
- Equipment:
- Equipment List: Displays the equipment linked to the customer in Service.
- New Equipment: Allows the users to create their own equipment records.
- Cases:
3. Projects
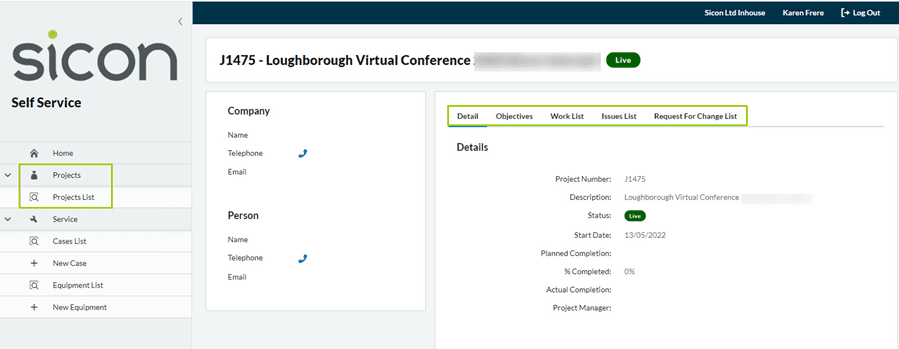
Click the icon to the left of Projects to see the list of the projects for the customer who is logged in.
To drill into the project and see more details click the icon to the left of the project number (3 vertical dots) then click View.

When you View the project, you can see any information that has been added to the Objectives, Work List, Issues List and Request For Change tabs. Note: These are view only.
4. Service
4.1. Case List
To log a case, click the + icon in the Cases menu.
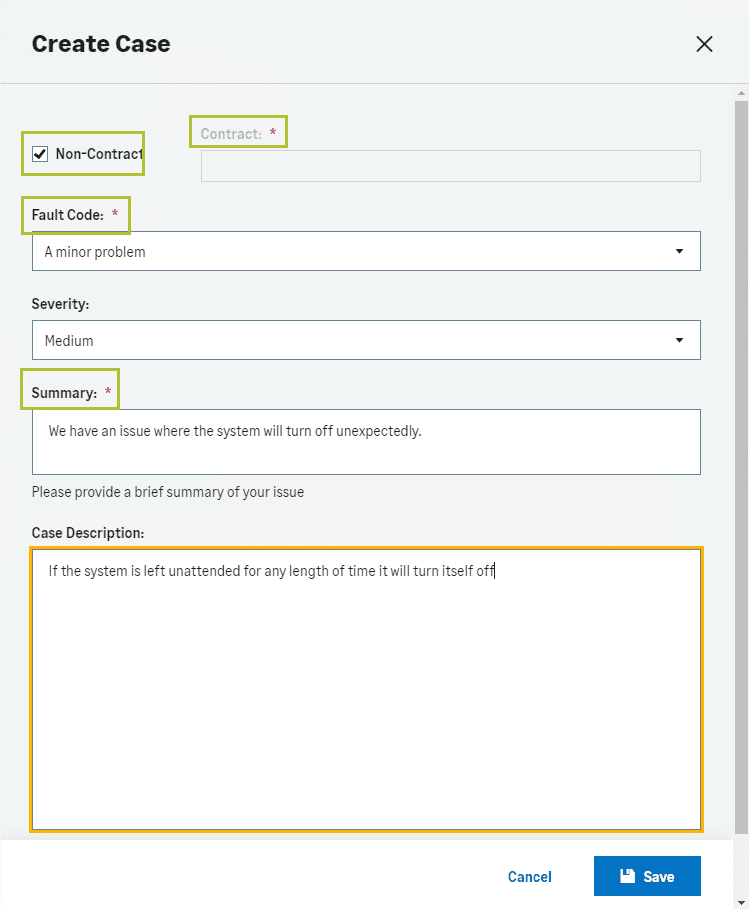
Fields that have a red asterisk are mandatory and you will not be able to Save until you have completed them.
Select a Contract from the drop-down list (you will only see the contracts relevant to the customer account) or tick Non-Contract.
Fault Codes are only selectable if you have ticked them in the Self Service Settings.
Pick the Severity of the case, these are set within the Service Settings Service Help & User Guide.
Summary is a mandatory field and should have a brief description of the case being raised.
Case Description is used to give full details or any replication steps that are relevant for the case.
Click Save to continue.
A confirmation message will be displayed showing the case number that has been generated. The new case alert message added to the Self Service settings is also shown.

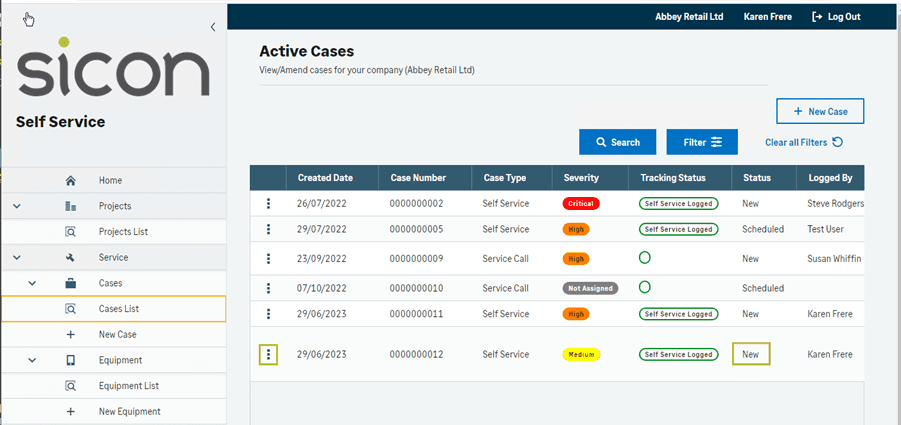
When a case is first logged via the Self Service portal the default tracking status is New.

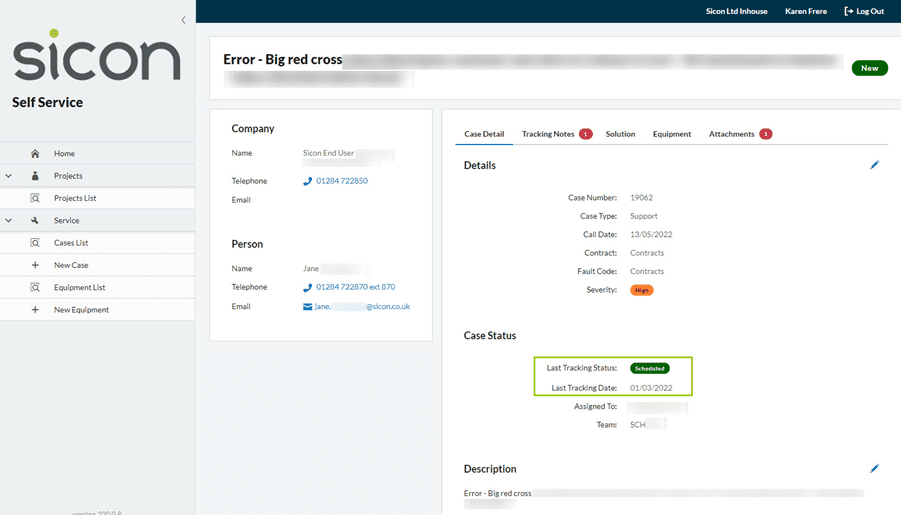
Click Details to view the additional details for the case – this shows who has created the case on the portal.

The severity is the one that was chosen when the case was logged – this can be changed on the service desk and is also editable by clicking the 3 dots to the left-hand side of the case and selecting the Edit option. The user can then make amendments to the case which needs to be saved.
Created Date and Case Number are system populated together with the Status, the rest are updated as the case is progressed from the service desk.
Click View (from the 3 dots option) to see more information on the case.
The Tracking Notes shows a 1 currently to indicate there is one tracking note for this case. The date and last tracking status are updated from service desk, so the user knows when this was last updated.
If you are using Teams and the case gets assigned to a Team this will also display on the Details tab.
On the Tracking Notes tab, the user can add tracking notes to update the case (they will only see the tracking notes that have been made available to customers during the setup of the tracking status’s), or they can view existing tracking notes.
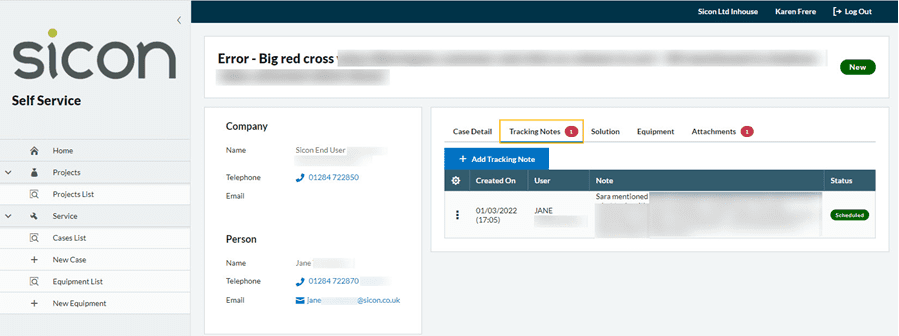
To enter a new tracking note, click the 3 dots to the left-hand side of the Created Date and select the View option. On the Tracking Notes tab click the blue + Add Tracking Note tab.
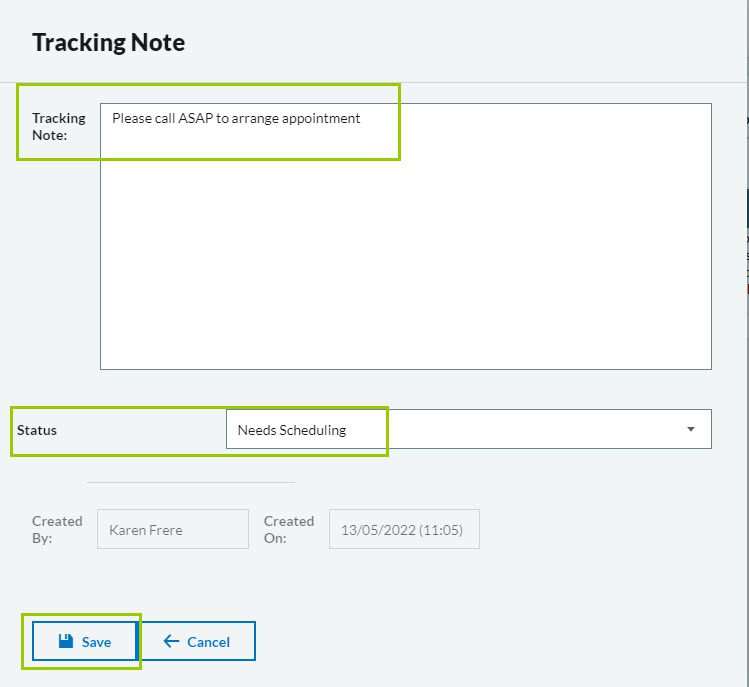
Add the tracking note text and select the status from the list available. These will be the ones that have been ticked as being available to customers in Service Manager – Maintain Tracking Status.
Save.
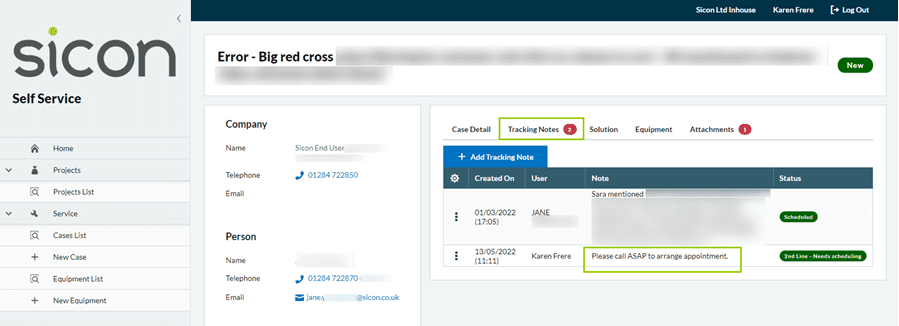
The tracking note is updated in the list on the Self Service portal and is also available on the service desk. The number of tracking notes has also incremented to show the addition of another note (this is when you are in View mode).
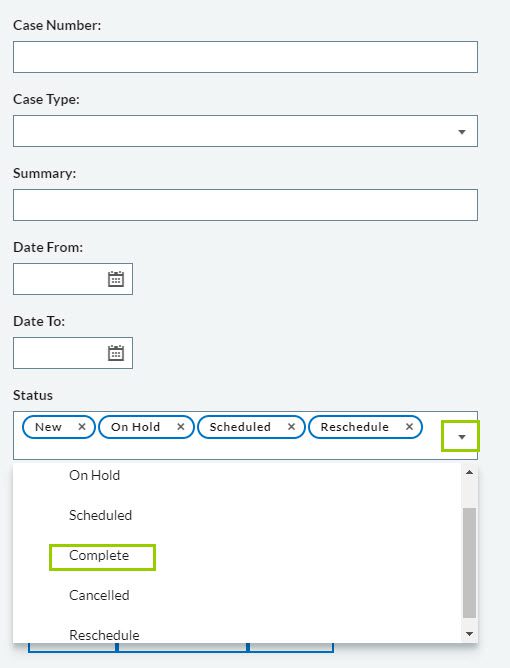
When the case is flagged as complete, this will not automatically show in the case list, but you can still get back to view it by using the Filter option to select a status of Complete and apply the filter.
4.2. Create a Case with Sicon CRM
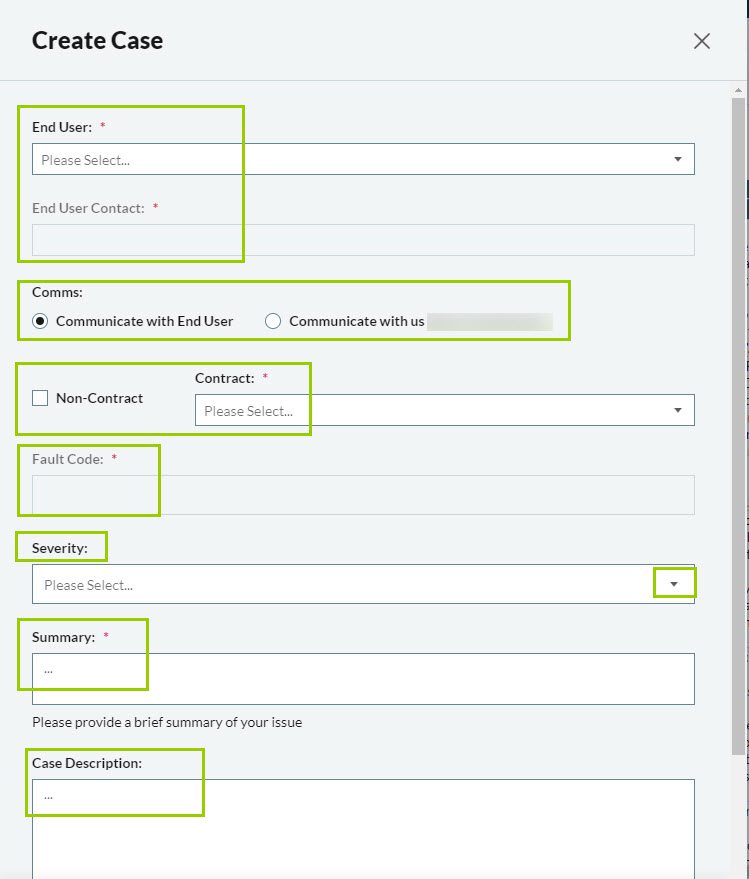
Select the End User and End User contact.
Choose between communicating with the end user or yourselves.
If the customer has a contract they will be able to select it from the drop-down list if they do not have a contract tick Non-Contract.
Fault codes are optional and depend on your Service settings.
Select the severity for the case – Critical, High, Medium, Low or N/A.
Add a summary of why the case is being raised, this can be expanded on in the Case Description box below the summary.
Save.
4.3. Create a Case without Sicon CRM
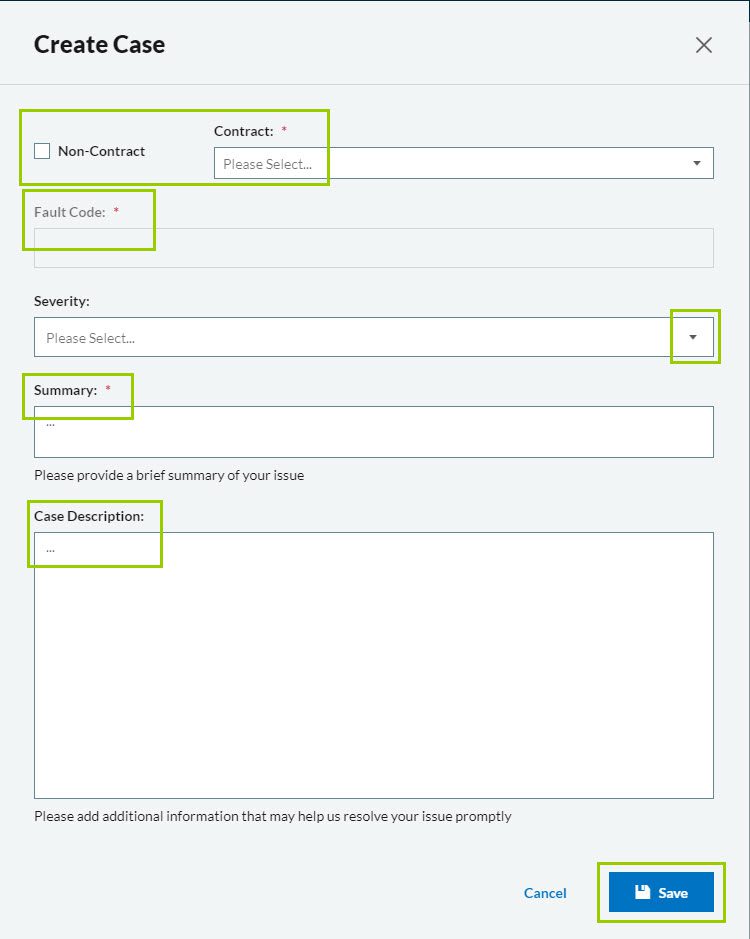
If the customer has a contract they will be able to select it from the drop-down list if they do not have a contract tick Non-Contract.
Fault codes are optional and depend on your Service settings.
Select the severity for the case – Critical, High, Medium, Low or N/A.
Add a summary of why the case is being raised, this can be expanded on in the Case Description box below the summary.
Save.
When you save the new case, a confirmation showing the case number is displayed. Click the cross to exit this screen.

4.4. Equipment List
The Equipment list will show a list of the customers equipment. Clicking the 3 dots to the left of the equipment record will allow you to view the equipment or add a case for the equipment.
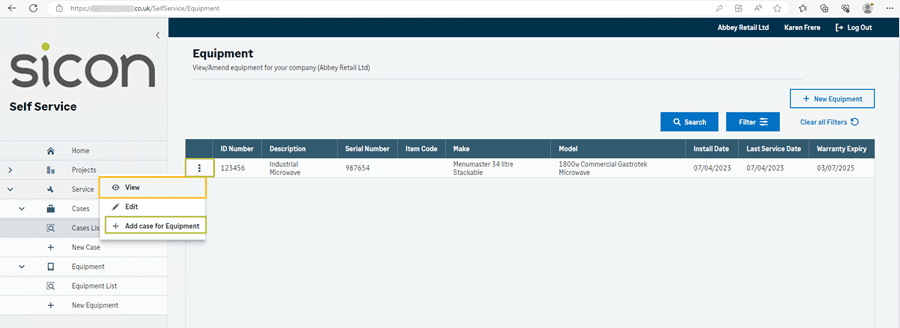
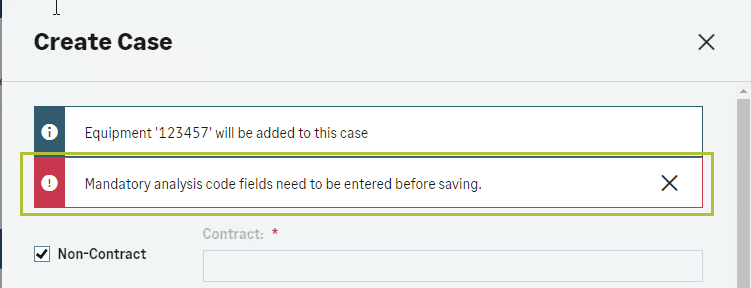
Clicking Add case for Equipment will open the Create Case as described above. As the case has been created from the equipment record in this instance, the equipment does not need to be selected manually.
Please Note: If you have setup Analysis Codes in the Service settings and have flagged them as Mandatory the users will not be able to save the case until the fields have been populated, they will be identified with a red *
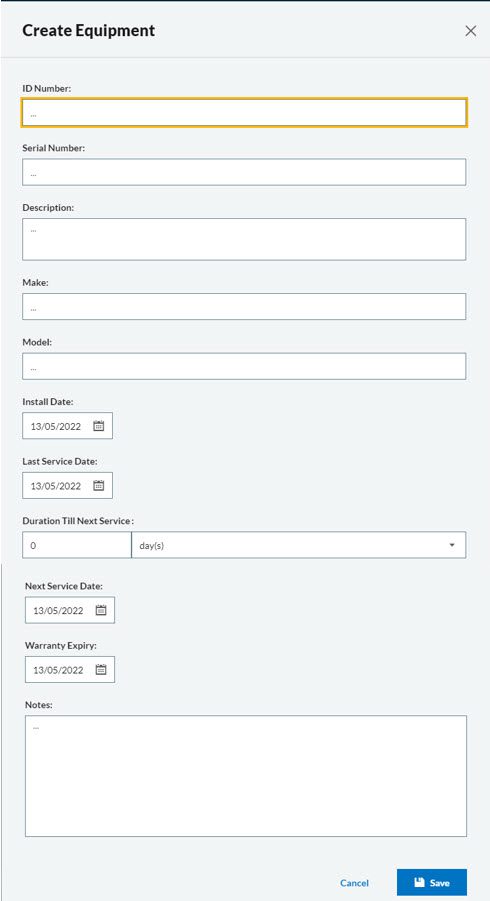
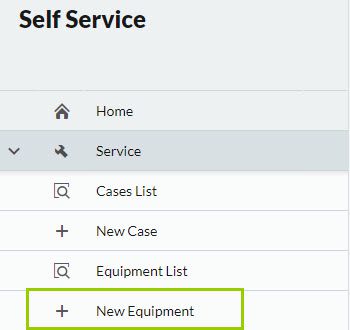
4.5. New Equipment
If you are allowing your customers to create their own equipment records and have activated this in the Self Service Settings they will see the New Equipment option.
ID Number, Serial Number, Description, Make and Model are all searchable fields so where this information is known it should be recorded, there are no mandatory fields.