WAP Help and User Guide – Installation for Sage 200
This document will guide you through installing Sicon WAP onto a server, configuring email if required, and connecting to a Sage 200 Database.
Search the page by pressing Ctrl + F (windows) or CMD +F (Mac) on your keyboard.
Back to all user guidesProduct overview
This document is aimed at Business Partners who wish to Install or Update WAP.
1. Basic Installation – Sage 200
This document will guide you through installing Sicon WAP onto a server and connecting to a Sage 200 Database.
A video of the process is also available within the Technical Area of the Business Partner Portal.
1.1. Prerequisites & Recommendations
Before attempting to install Sicon WAP, please refer to the WAP Install Form on the Business Partner Portal to ensure the prerequisites are fulfilled. N.B. if Sage 200 Server is installed, most of the prerequisites will be met.
Unlike Sicon Add-on modules, WAP cannot be downloaded from the Business Partner Portal and Sicon will provide the files relevant to the customer’s version of Sage. Download and unzip the install files to an accessible location, such as a folder on the desktop.
2. Installing WAP
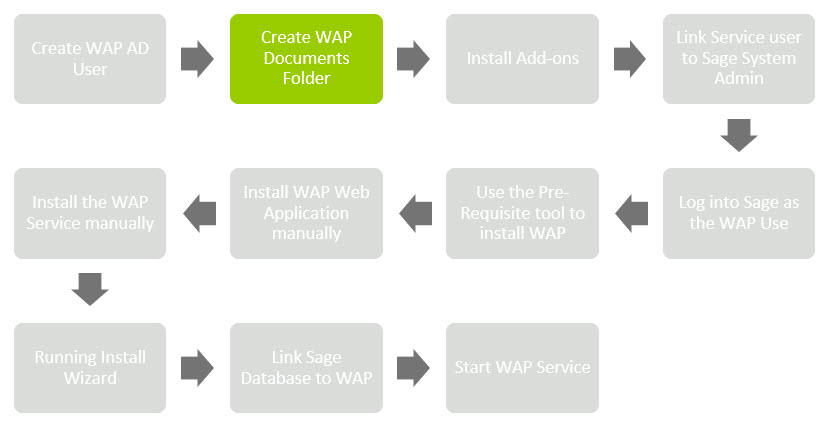
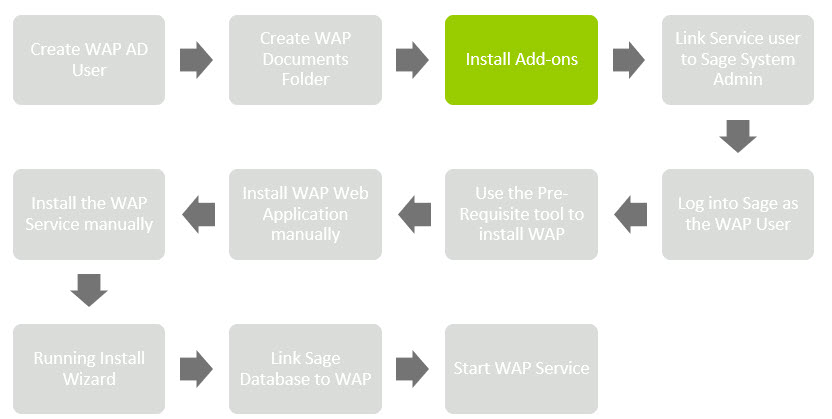
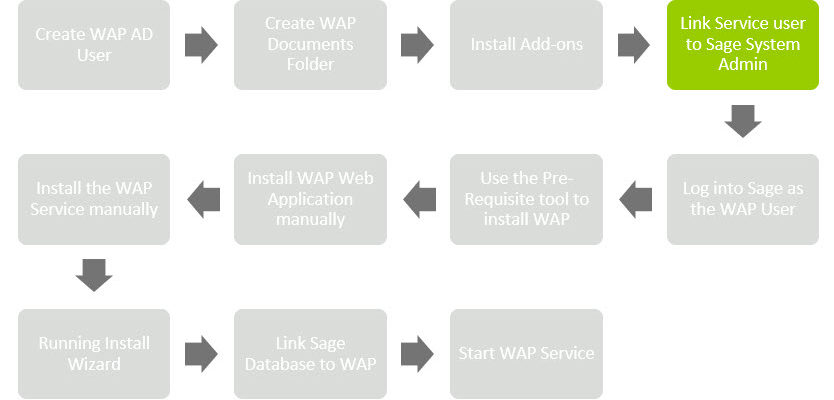
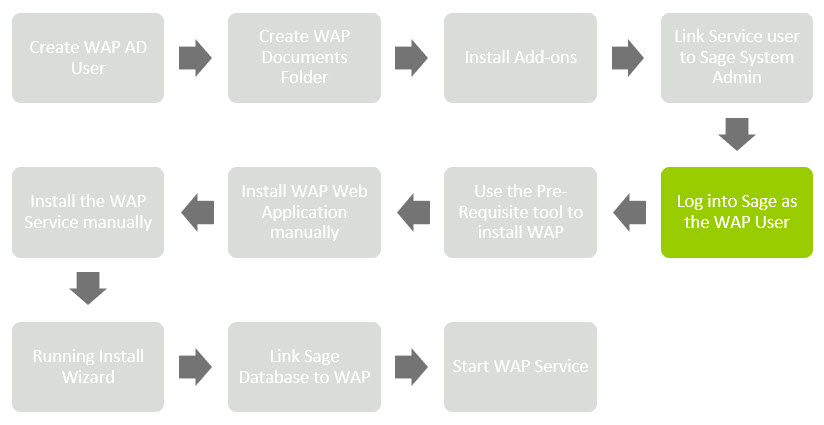
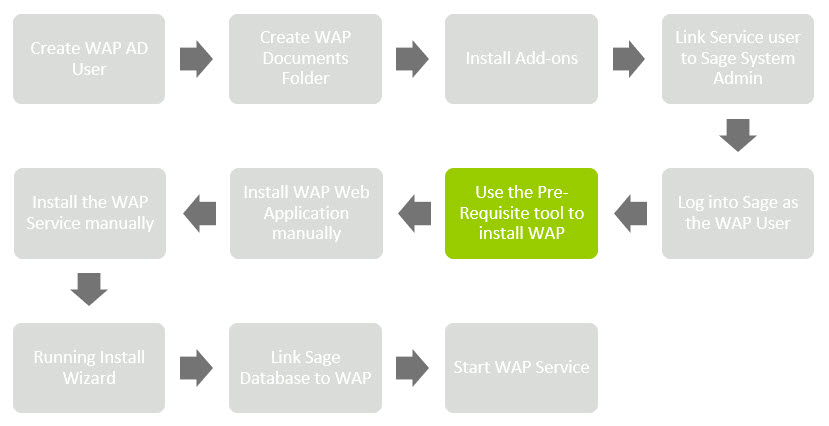
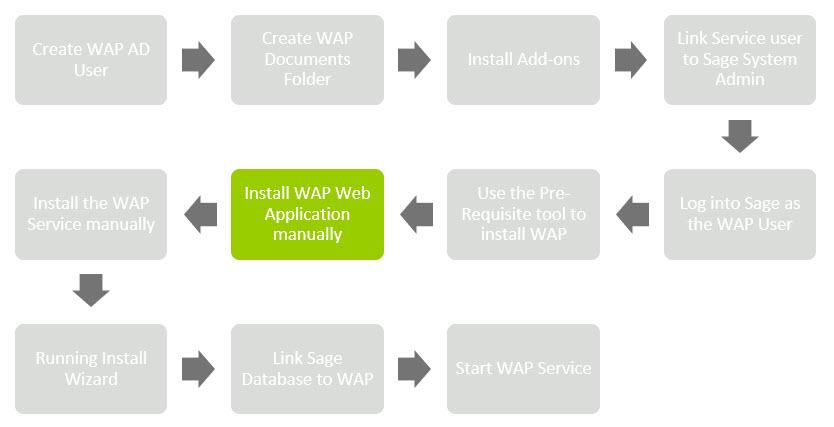
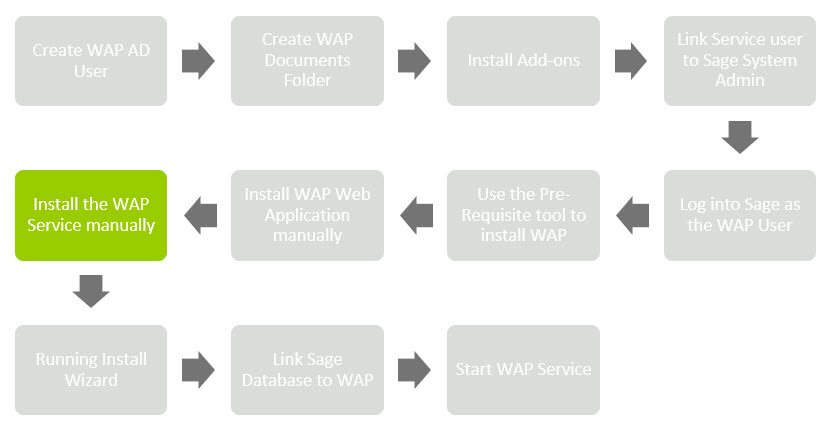
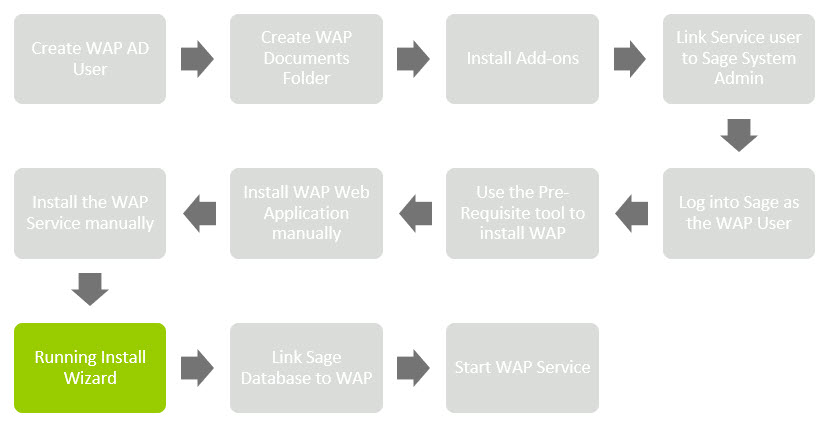
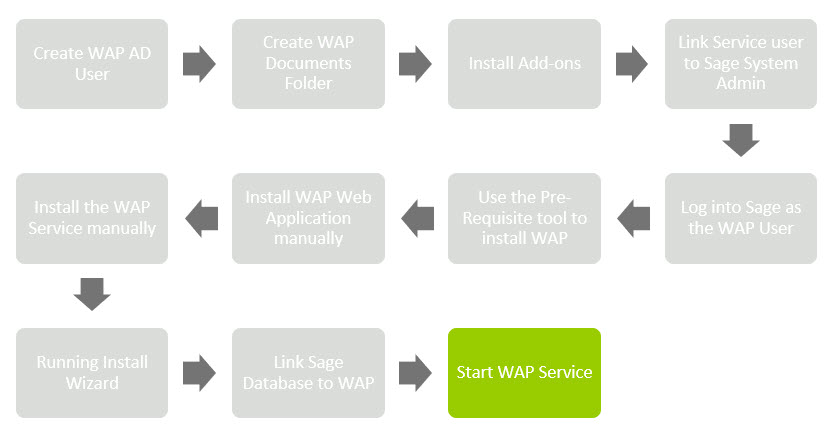
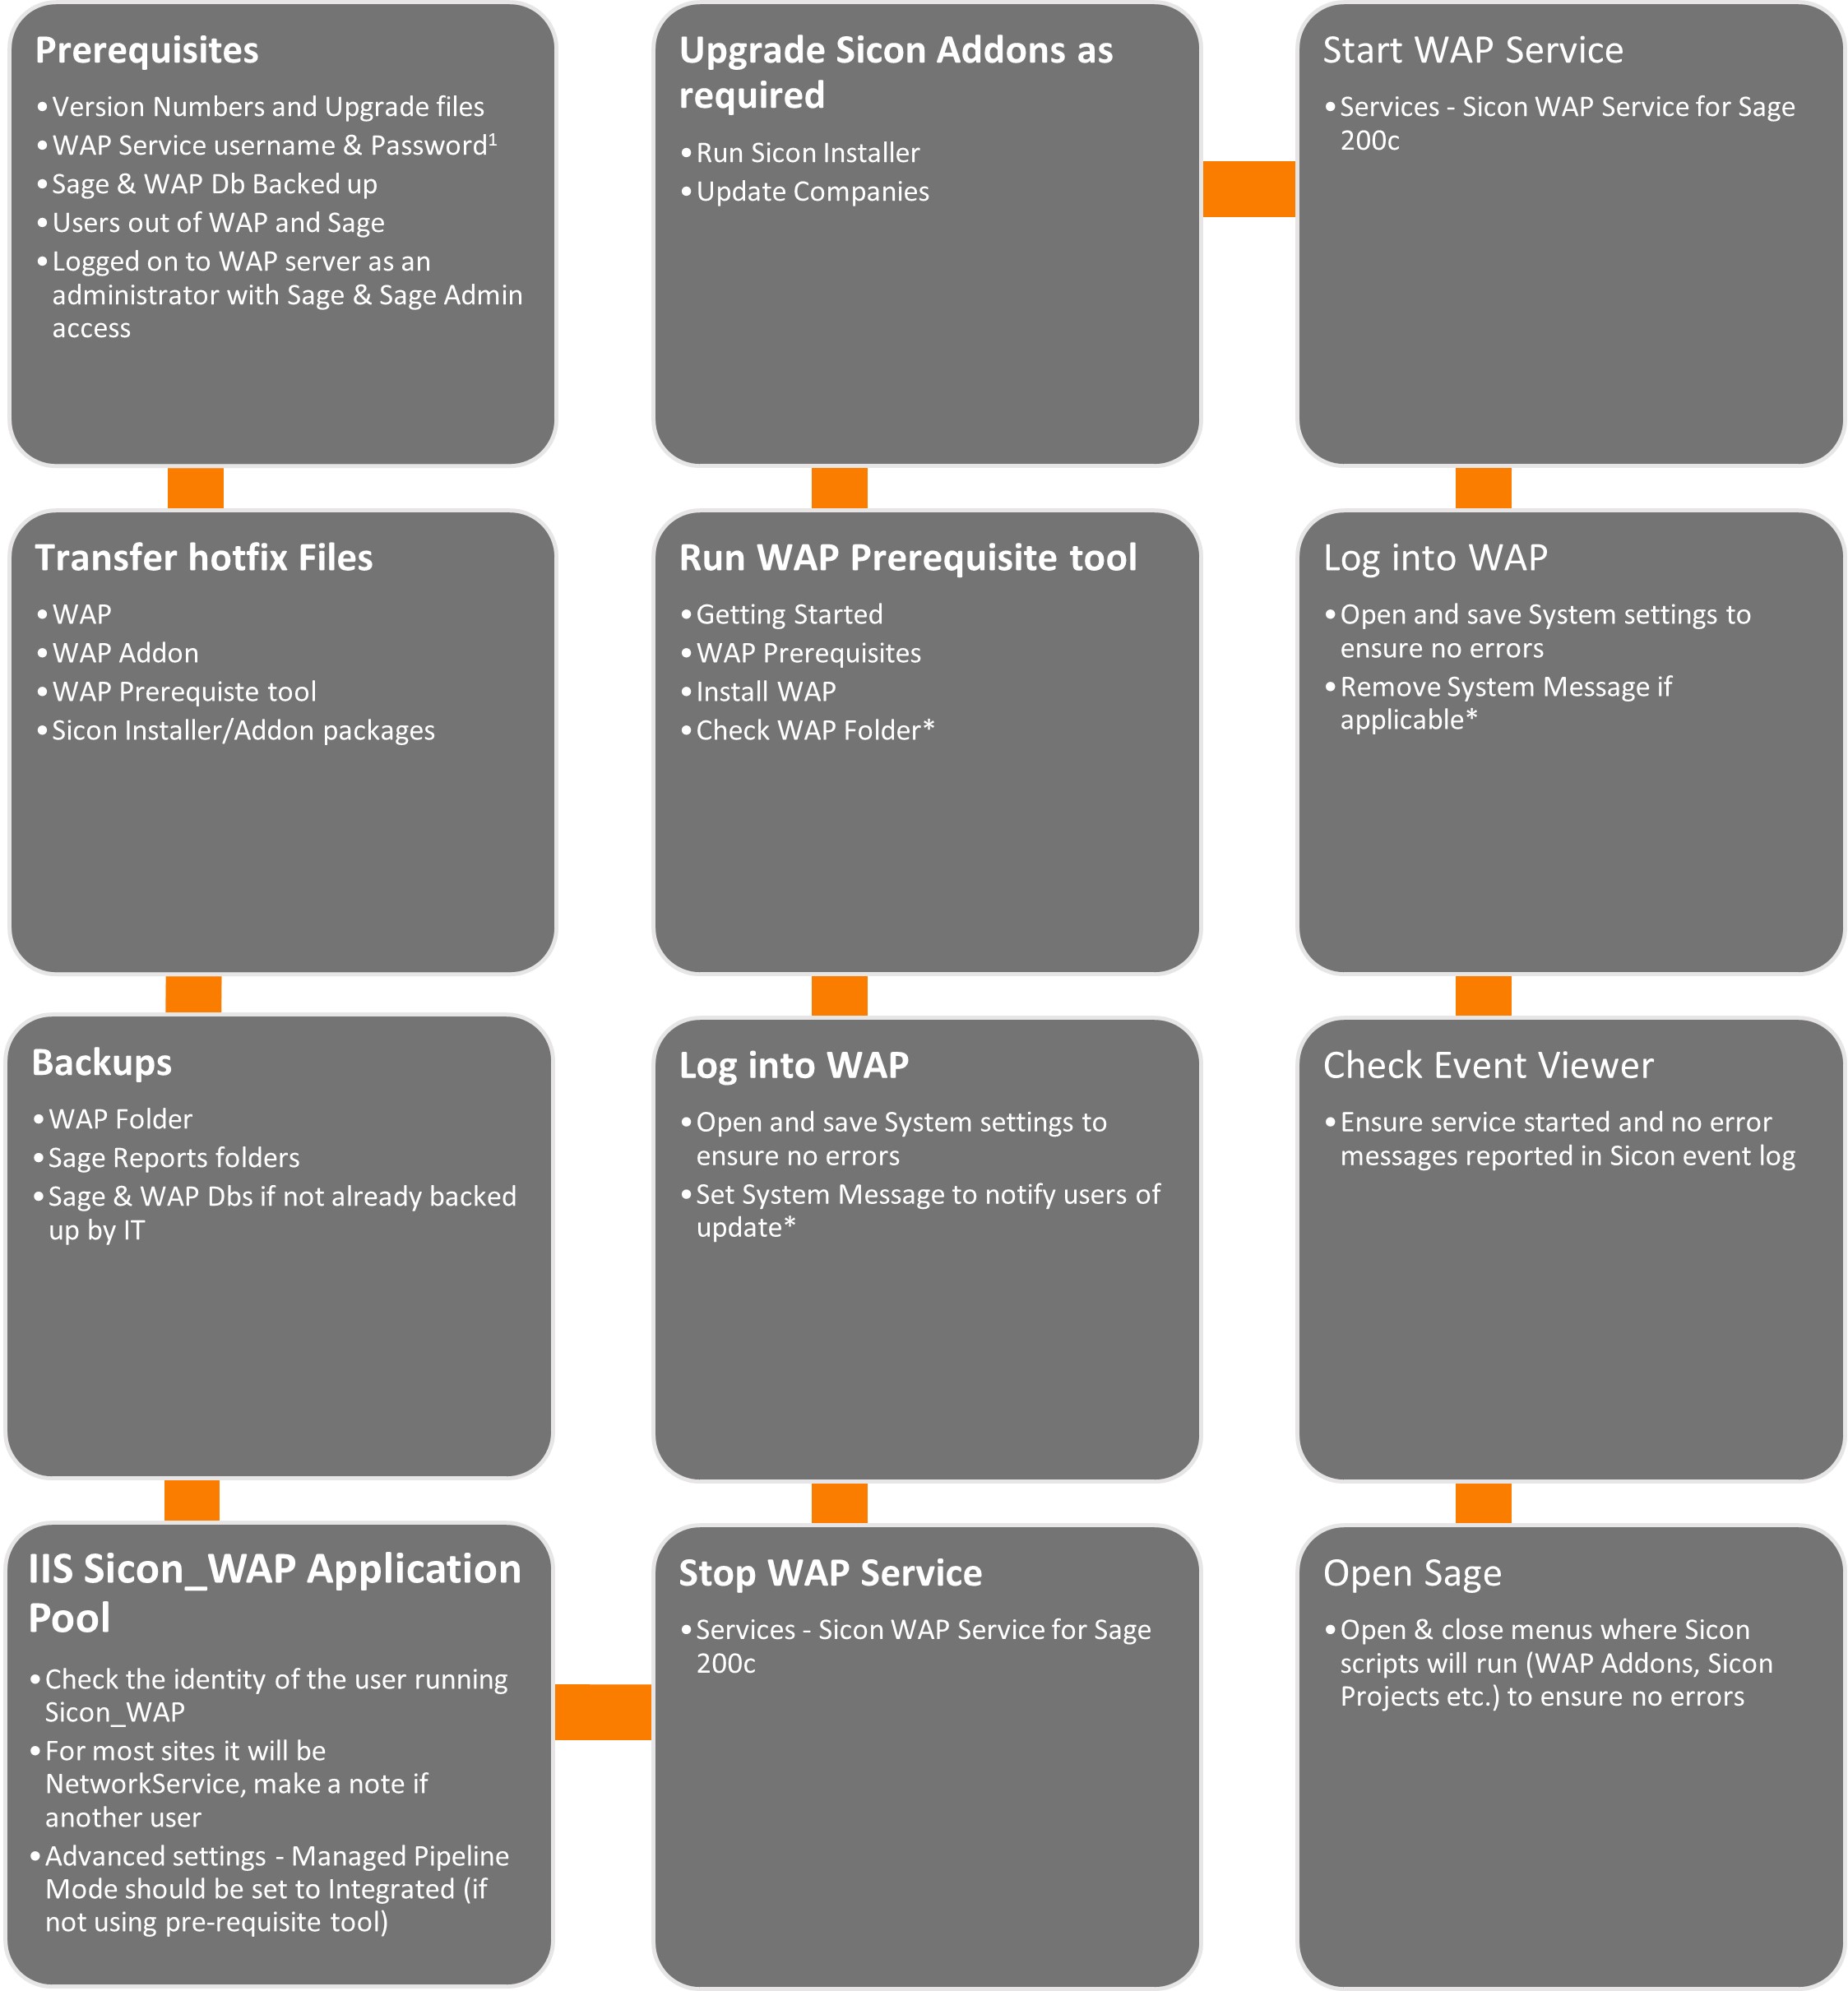
The overall steps to install WAP are highlighted below:
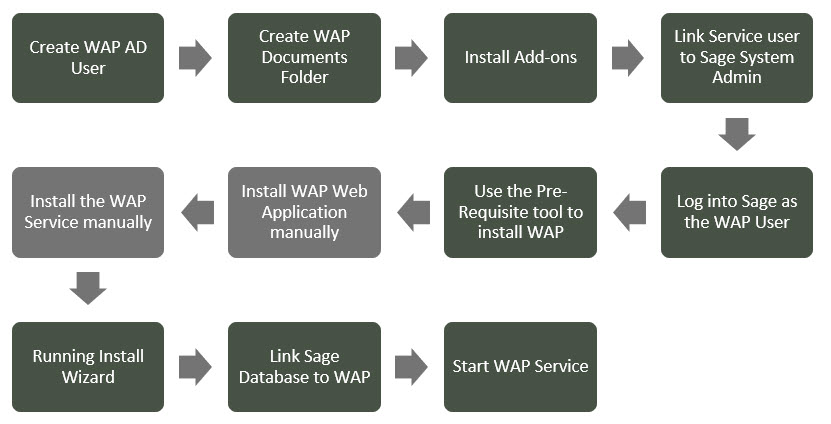
It is recommended to use the Sicon Pre-Requisite tool to install WAP. Alternatively, the WAP files can be installed manually. Further information on each step and either install option are contained in the following sections.
2.1. Creating AD User
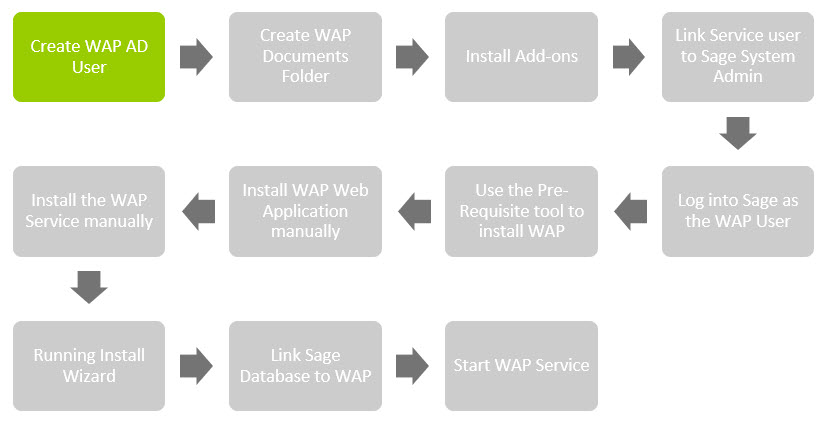
This must be completed prior to a WAP install taking place.
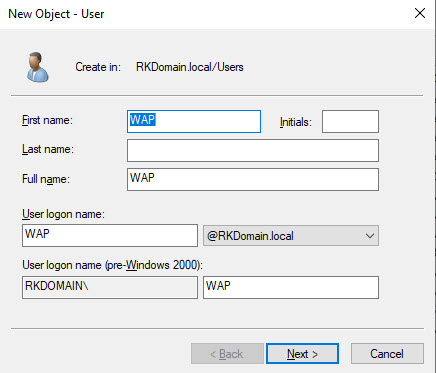
An Active Directory Domain user needs to be created specifically for WAP, by the IT resource prior to the WAP installation taking place. This user will then need to be linked to the Administrators and Sage 200 Users Active Directory groups.
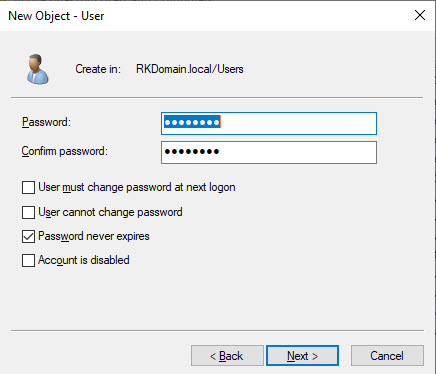
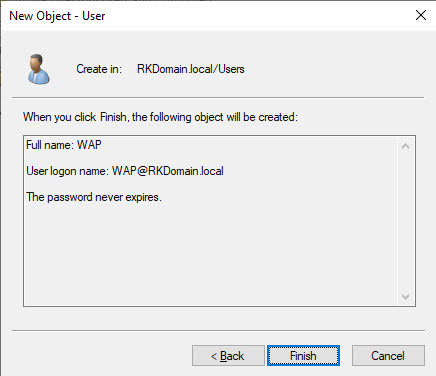
Below a new user “WAP” is being created; make sure this user’s password is set to never expire.
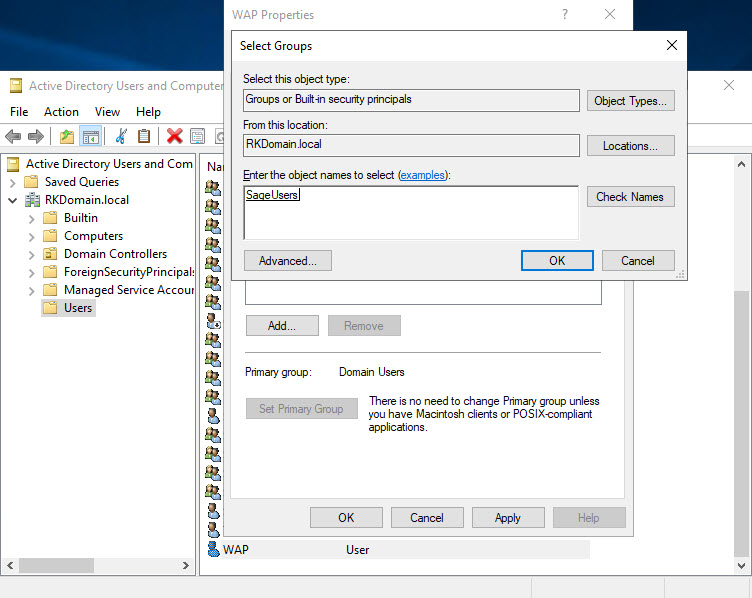
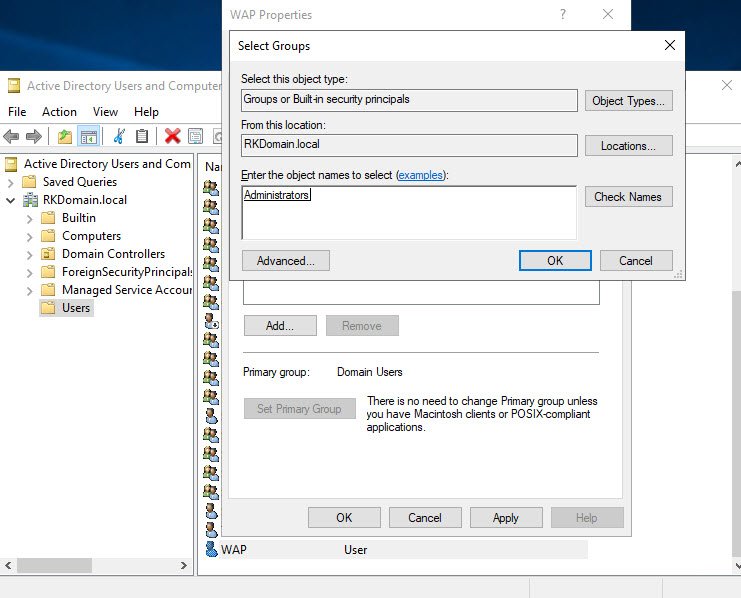
Link this user through to the ‘Sage 200 Users’ and ‘Local Administrators’ Active Directory security groups.
If WAP and Sage are installed on different servers, the WAP Active Director user needs to be a local administrator on both the Sage Server and the server that WAP will be running on.
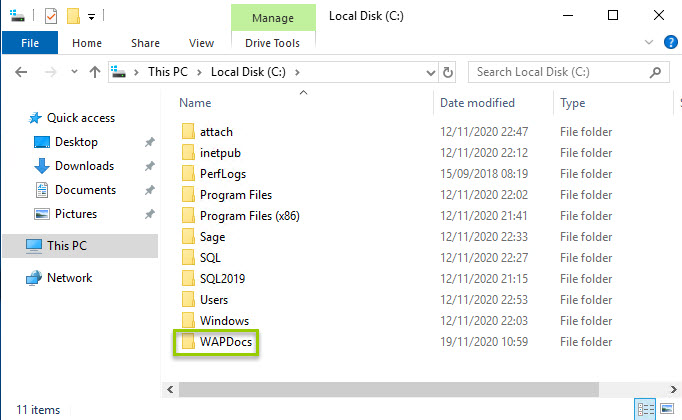
2.2. Create Folder for WAP Documents
Create a new folder for WAP to save documents to if not already done. Make sure this is a local folder the WAP user has access to; ideally this is held in the root of the data drive and would usually either be created as C:\Sage\WAPDocs or E:\Sage\WAPDocs.
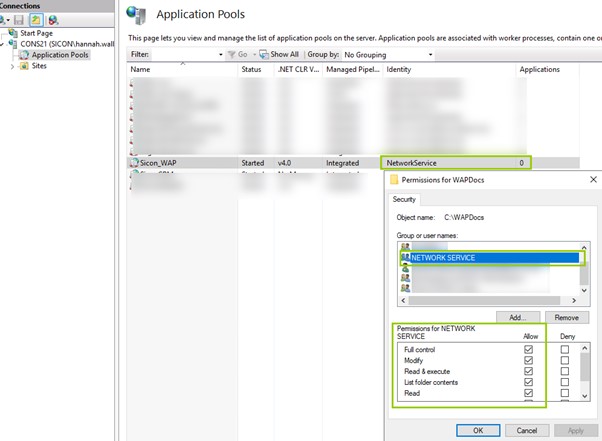
Please note: if the WAP Documents folder is to be stored somewhere that isn’t the root drive of the same server, ensure that the user running the Sicon_WAP Application Pool (in IIS) has full permissions for this folder:
2.3. Installing Add-Ons
All required add-ons should have been sent with the WAP install files, and are also available on the Business Partner portal – Project Admin area – Product Downloads. The Sicon Product Installer and Updater Tool is also available here and is recommended to download the required add-ons.
If only WAP is to be installed, the required add-ons are;
- Sicon Common Components
- Sicon Common Components Reports
- Sicon DevExpress 18.1 Package 1
- Sicon DevExpress 18.1 Package 2
- Sicon WAP Addons
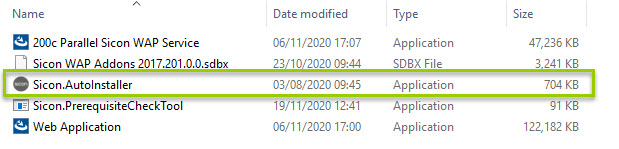
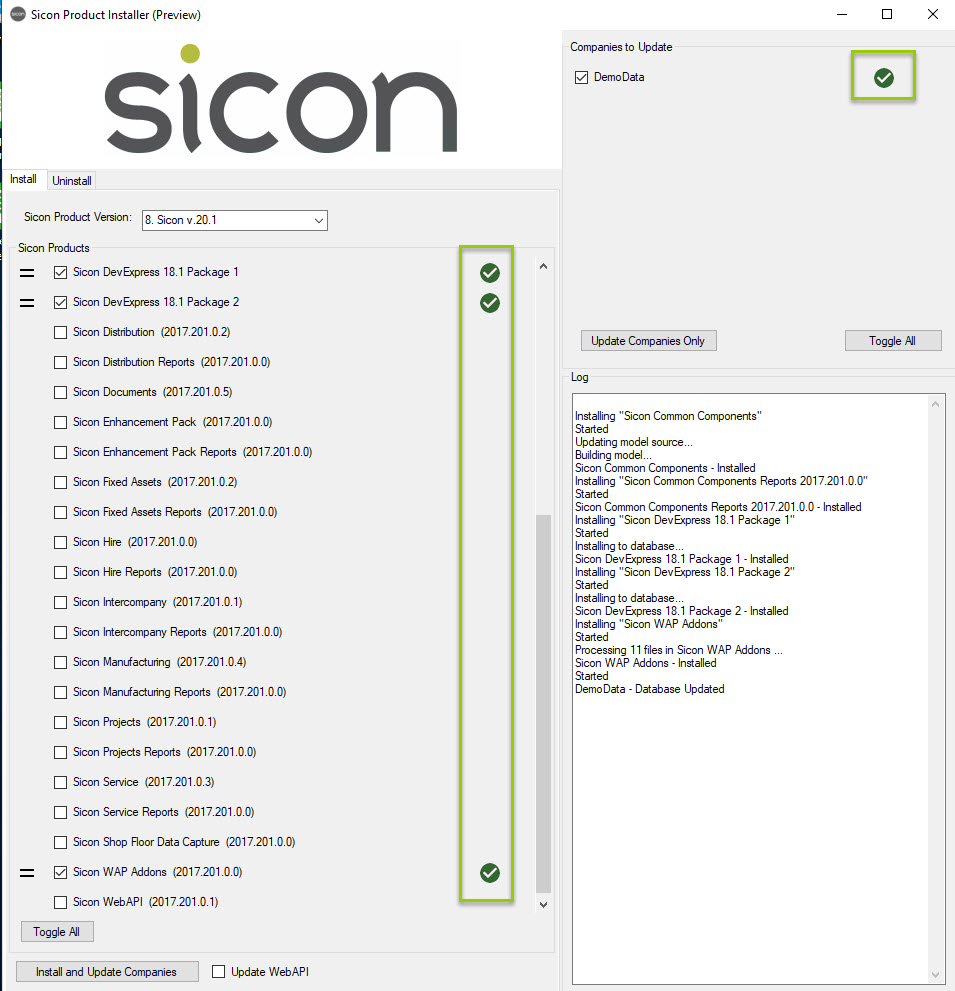
Open the Sicon.AutoInstaller application:
Select the Sicon Procut version, tick the relevant modules to be installed and select which companies to update:

In our example WebAPI will not be installed so UpdateWebAPI has been unticked.
If companies are not updated as part of the install, ensure companies are updated afterwards. Green ticks will indicate that the install has completed successfully:
2.4. Linking WAP User to Sage System Admin
Open Sage System Admin and link through the WAP user created earlier.
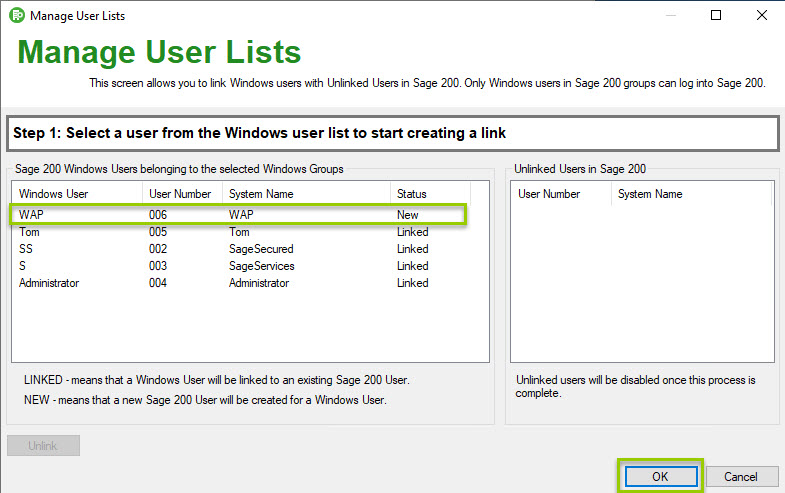
Create a new role “WAP” which has remote users access only; this will ensure the user does not take up a Sage licence when running the WAP service.
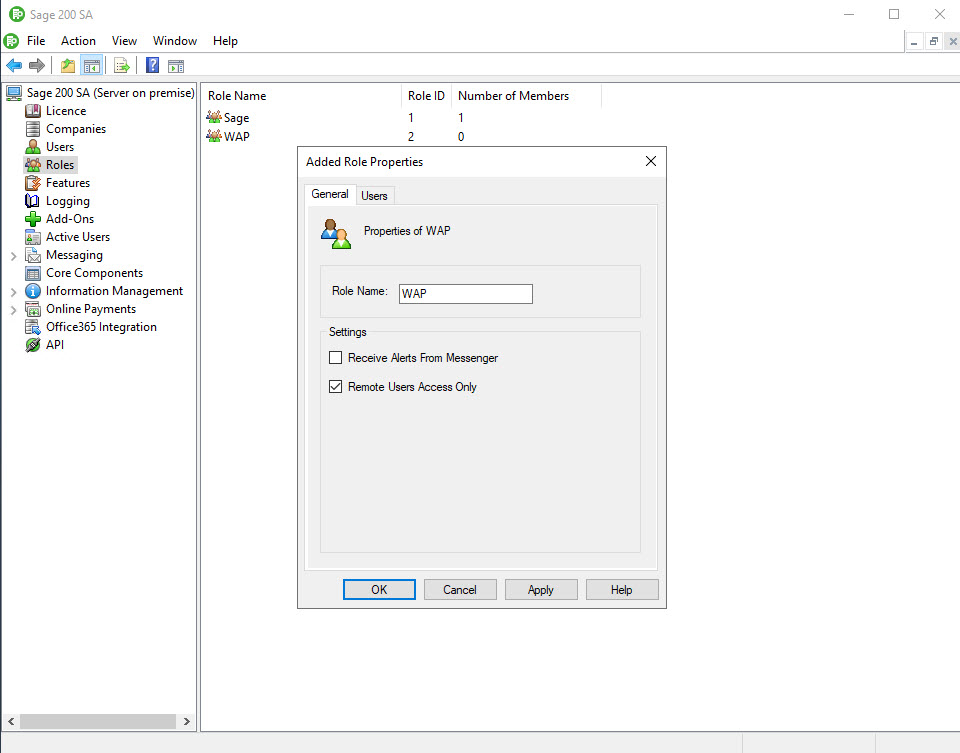
The only user in this role should be the WAP user which should belong to no other roles.
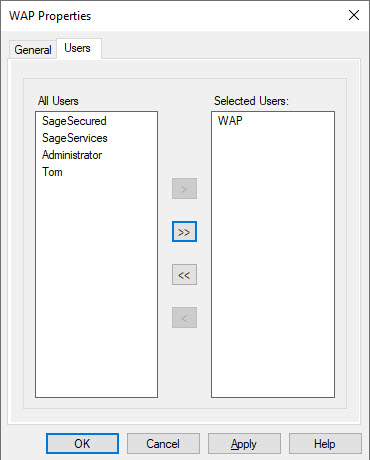
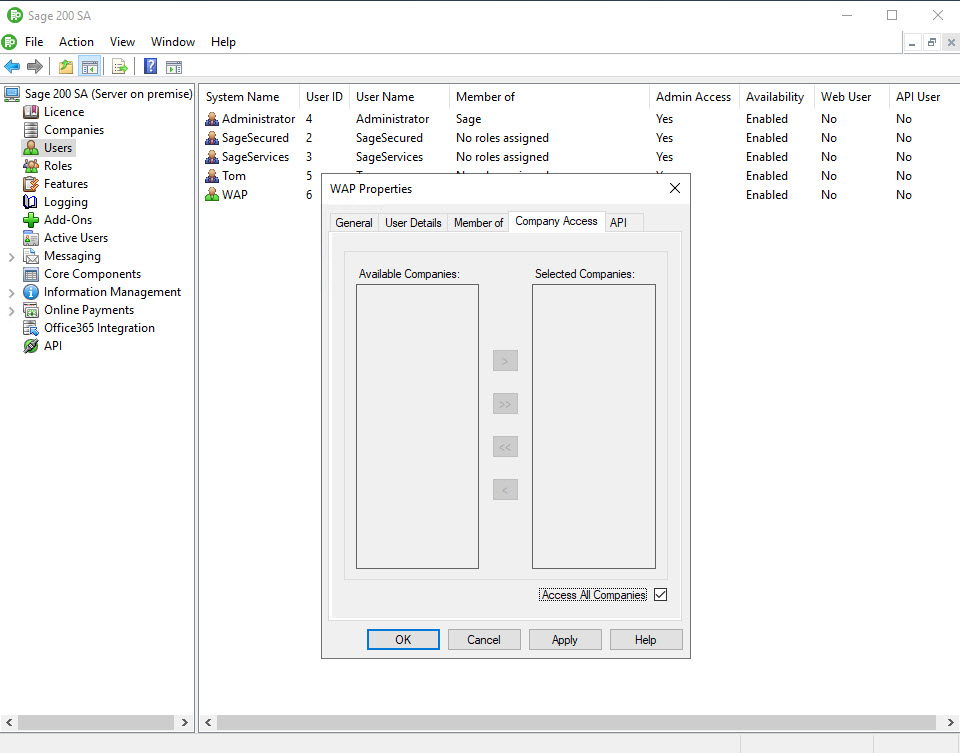
Make sure this user has access to all companies.
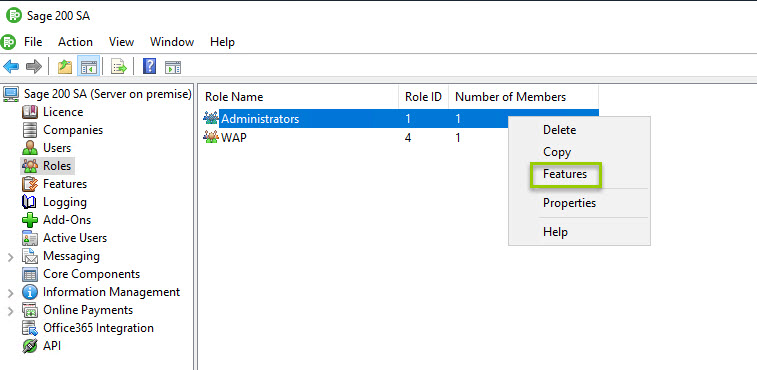
For the purposes an install only, no features need to be added. As best practice however, it is recommended that at least the ‘Administrators’ role is assigned the WAP Addon features initially. Right click on a Role, choose Features.
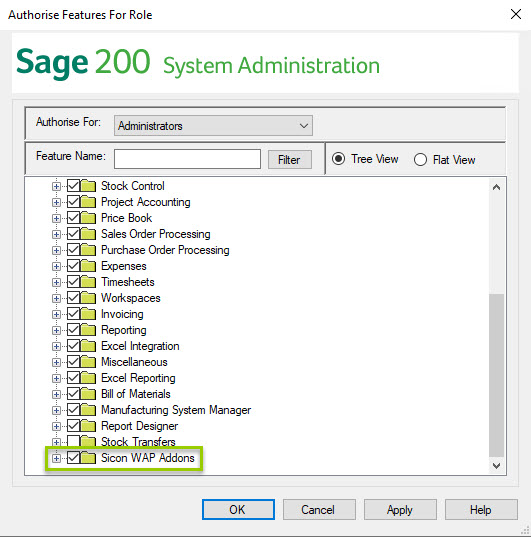
Locate and select the WAP Add-ons tick box and click OK. Please see the Sicon WAP Add-on Help and User Guide for more information on the features of this add-on.
Make sure that in System Admin ‘Enforce Login Status’ is disabled:
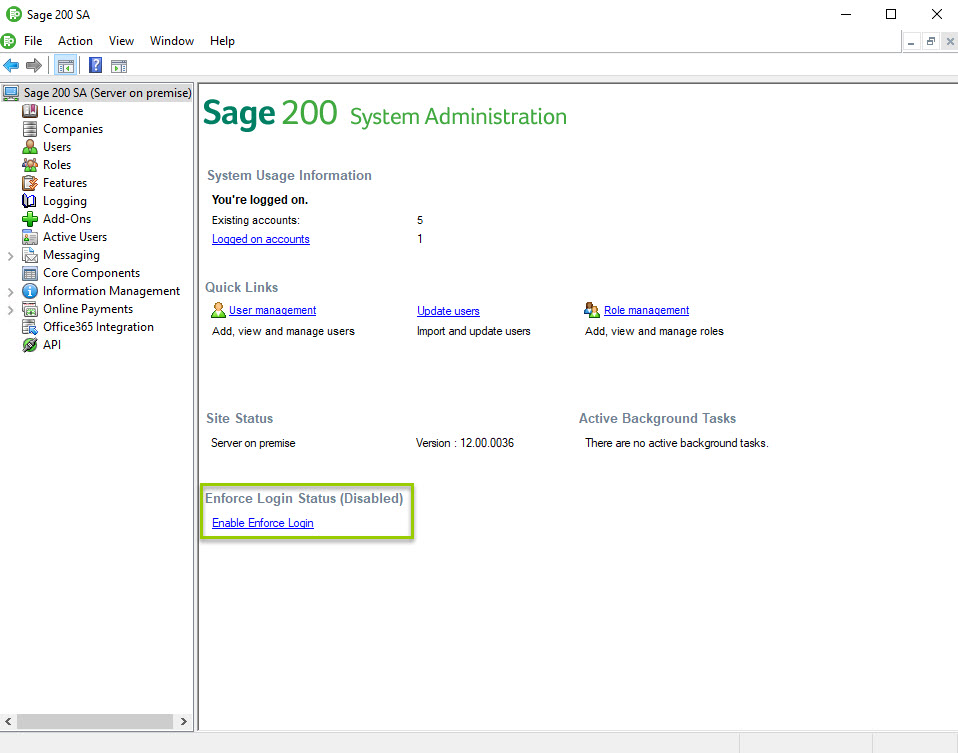
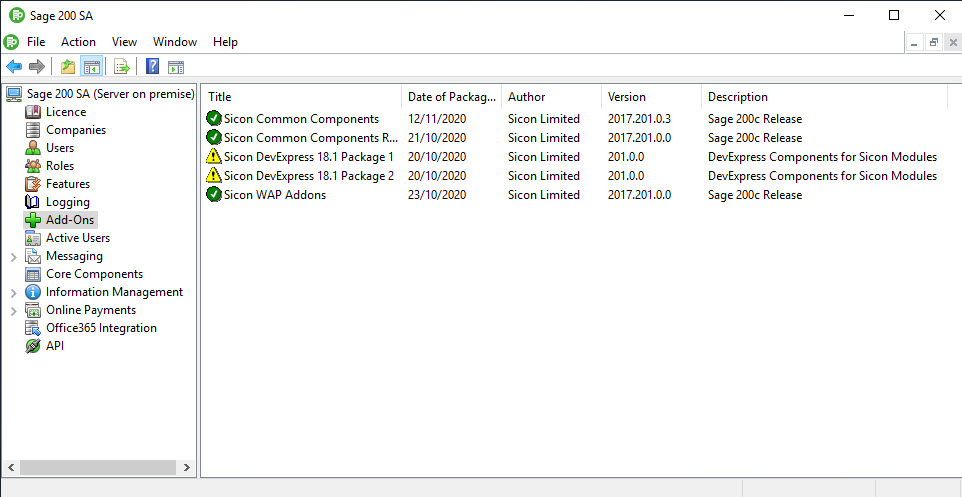
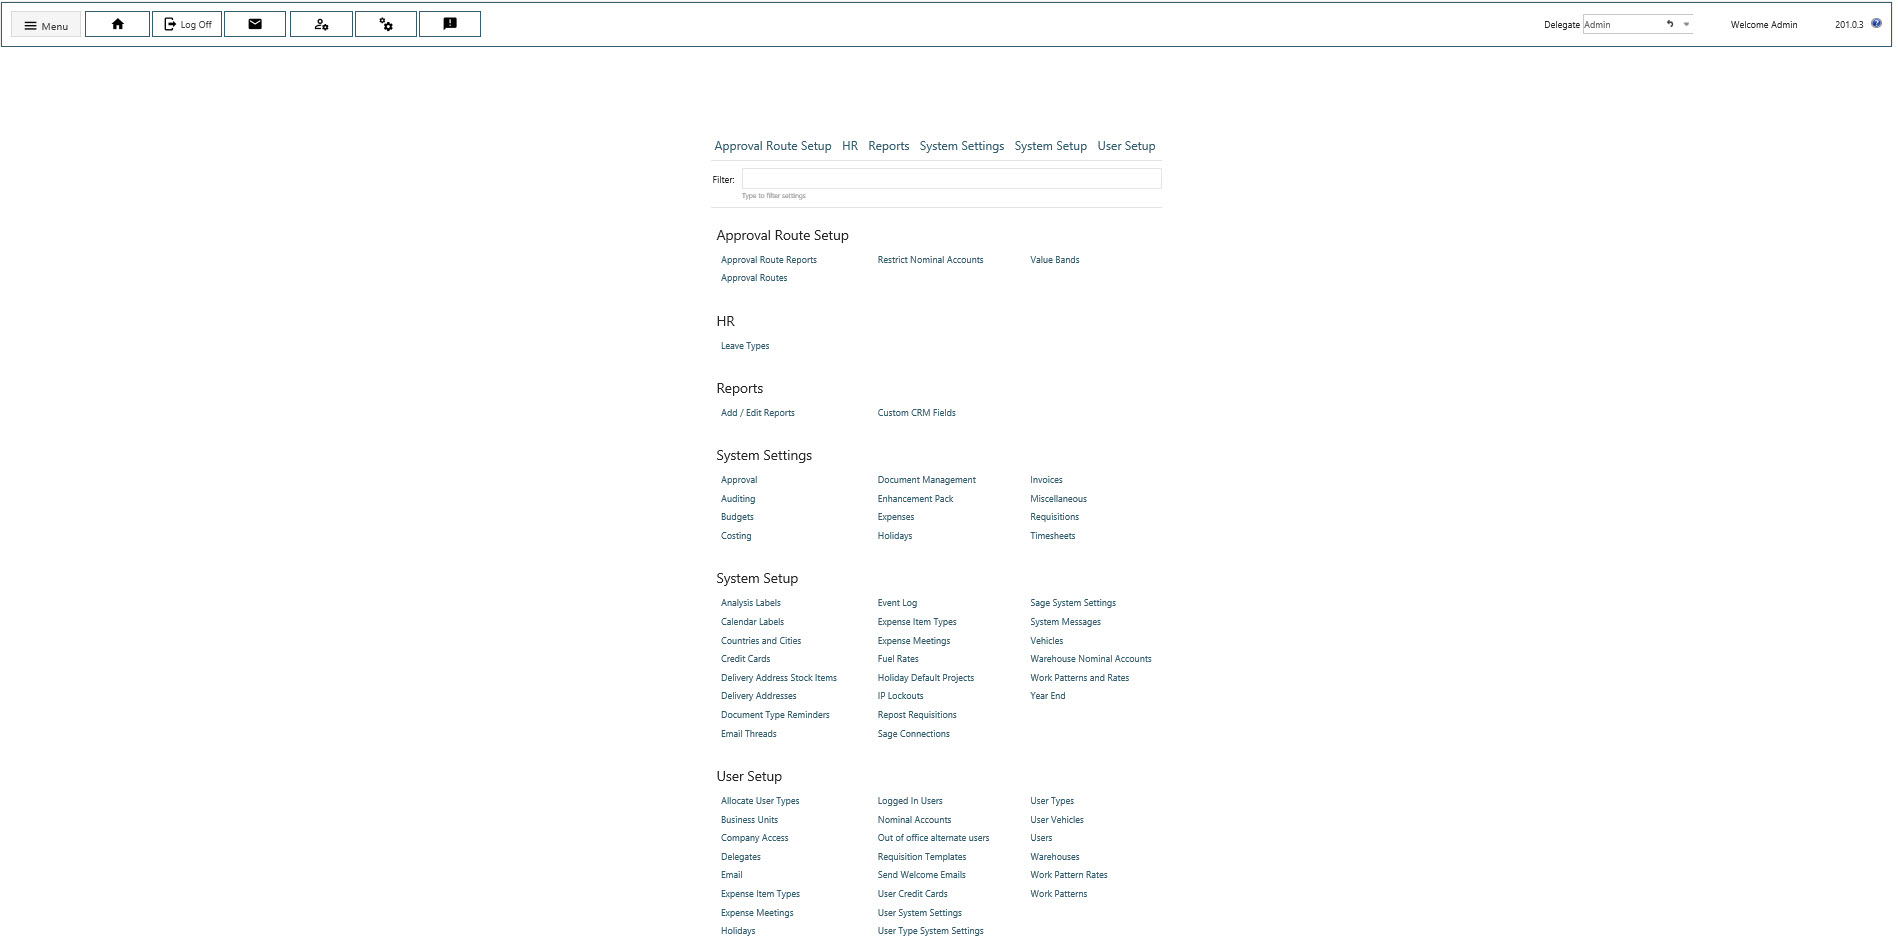
Finally, in the add-ons screen, check that the Sicon modules installed in the last step are showing as expected:
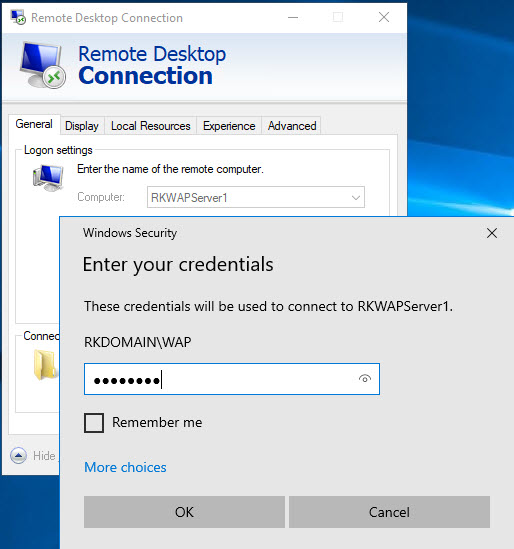
2.5. Log into Sage as the WAP User
In order for WAP and Sage to link together correctly, make sure to log into Sage as the WAP user. Since Sage 200c, the best way to achieve this is to RDP onto the same server where WAP will be installed using the WAP user credentials created earlier.
This will mean that once connected as WAP, the Sage installer will need to be run as they would for any other new user.
Upon opening Sage, a message that the user is in a restricted role will appear. This is normal and as far as Sage needs to go for the WAP install.
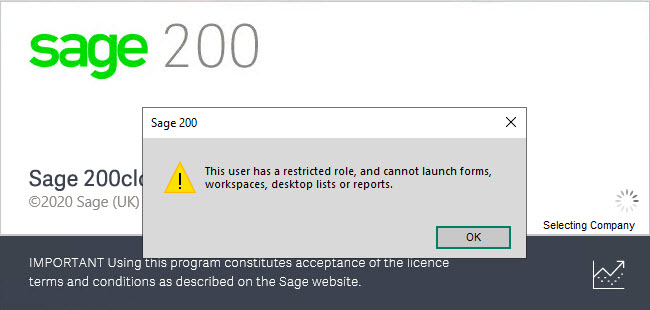
Click OK and Sage will close automatically. Sign out of the RDP and return to the remaining installation steps.
2.6. Using the Sicon Pre-Requisite tool
It is recommended to use this tool to install and update WAP. If this method is used to install, the next two steps covering manually installing the web application and web service will not be required, and users can skip to the section on Running Initial WAP Setup Wizard.
All required installers will have been sent and will include a Sicon Pre-requisite check tool which is recommended to at least ensure all pre-requisites have been met even if it is not used to install WAP.
Getting Started
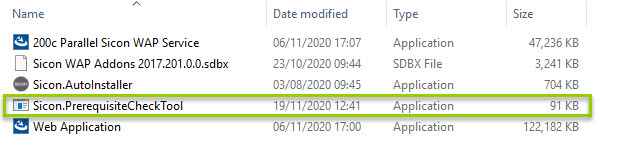
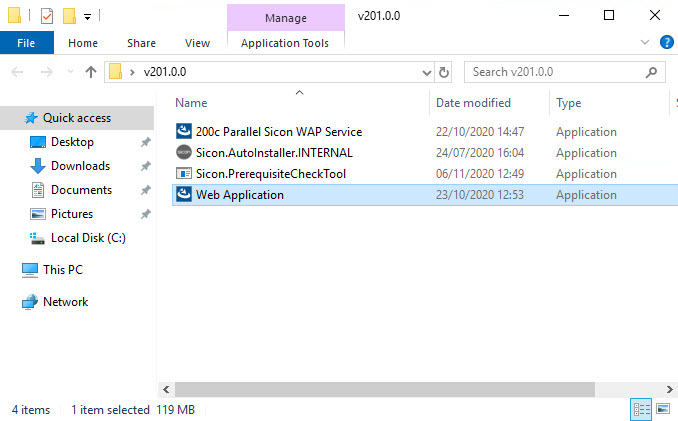
Ensure that the Parallel WAP Service and Web Application files are saved in the same location like above, and open the Sicon.PrerequisiteCheckTool application. This will open the Getting Started section:
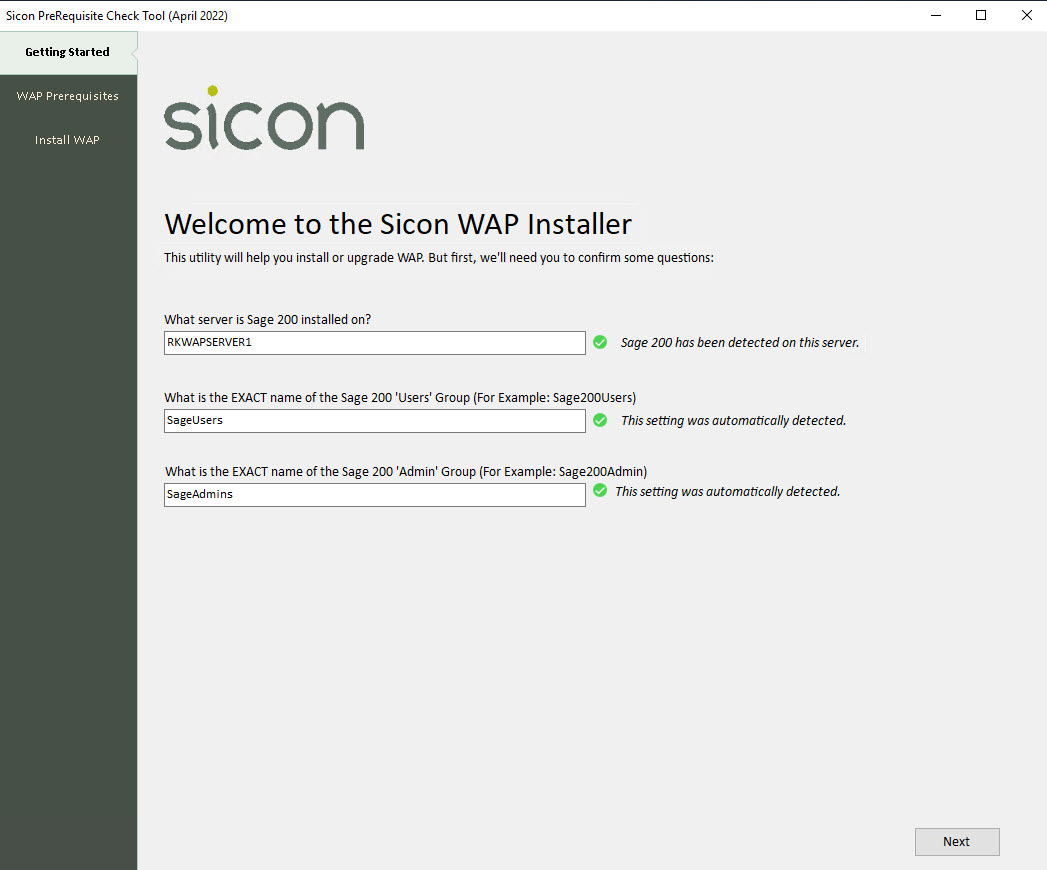
If WAP is installed on the same server as Sage, the tool will be able to pick up the server and Sage 200 Users and Admin groups automatically. Otherwise these details will need to be entered manually. Click next to proceed.
WAP Prerequisites
Enter the domain account name set up earlier in this guide, and enter the password as configured earlier:
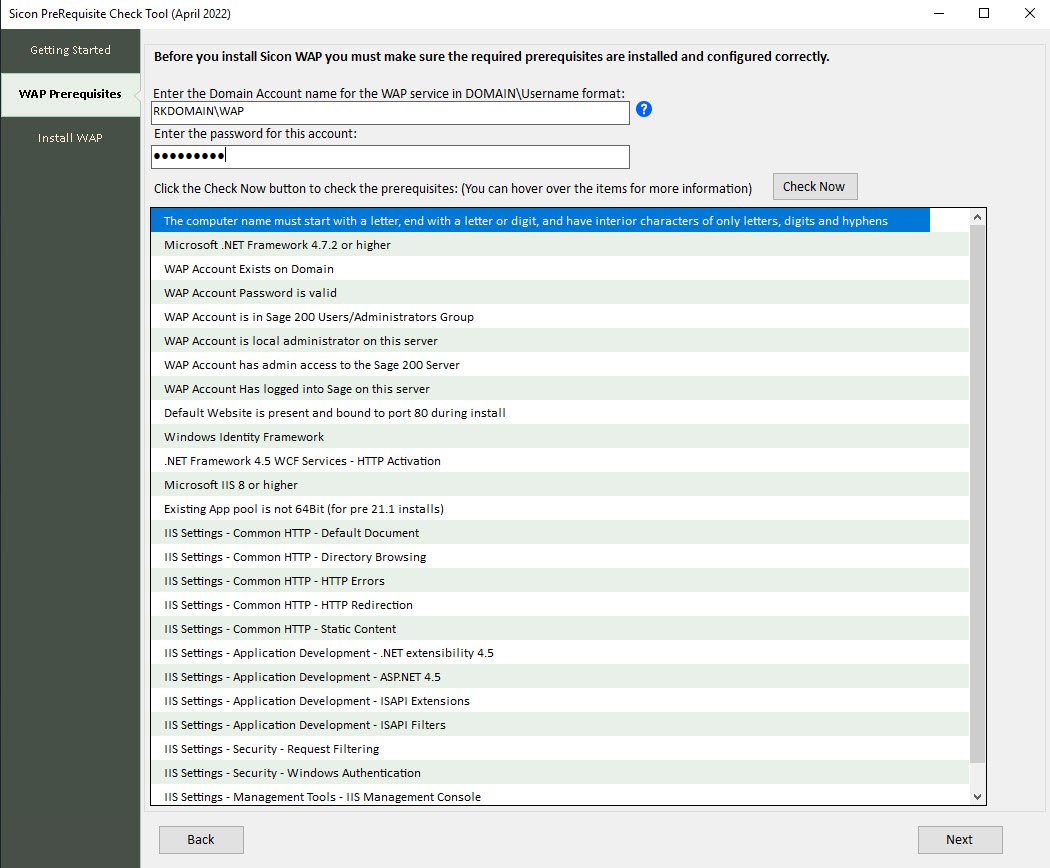
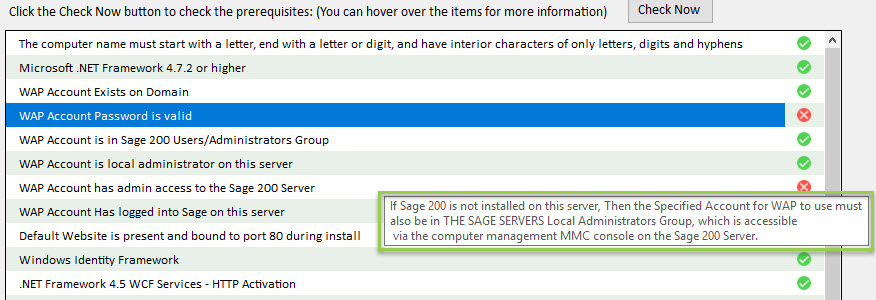
Click ‘Check Now’ to ensure there are no errors and all prerequisites have been completed. If there are any steps with a red cross, these must be addressed before WAP can be installed. Hover over each item to show a tooltip with further guidance:
All pre-requisites must show with a green tick before an install will be successful:
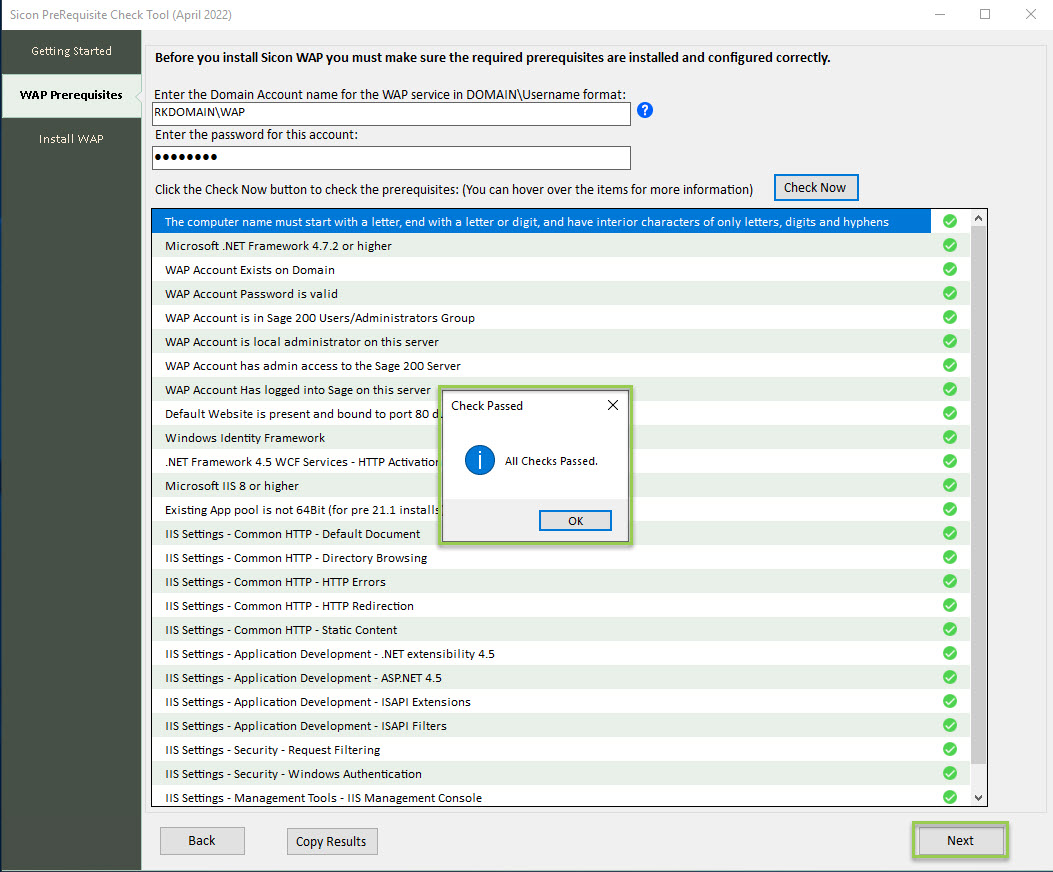
Click Next to proceed to install WAP through the Prerequisite tool.
Install WAP
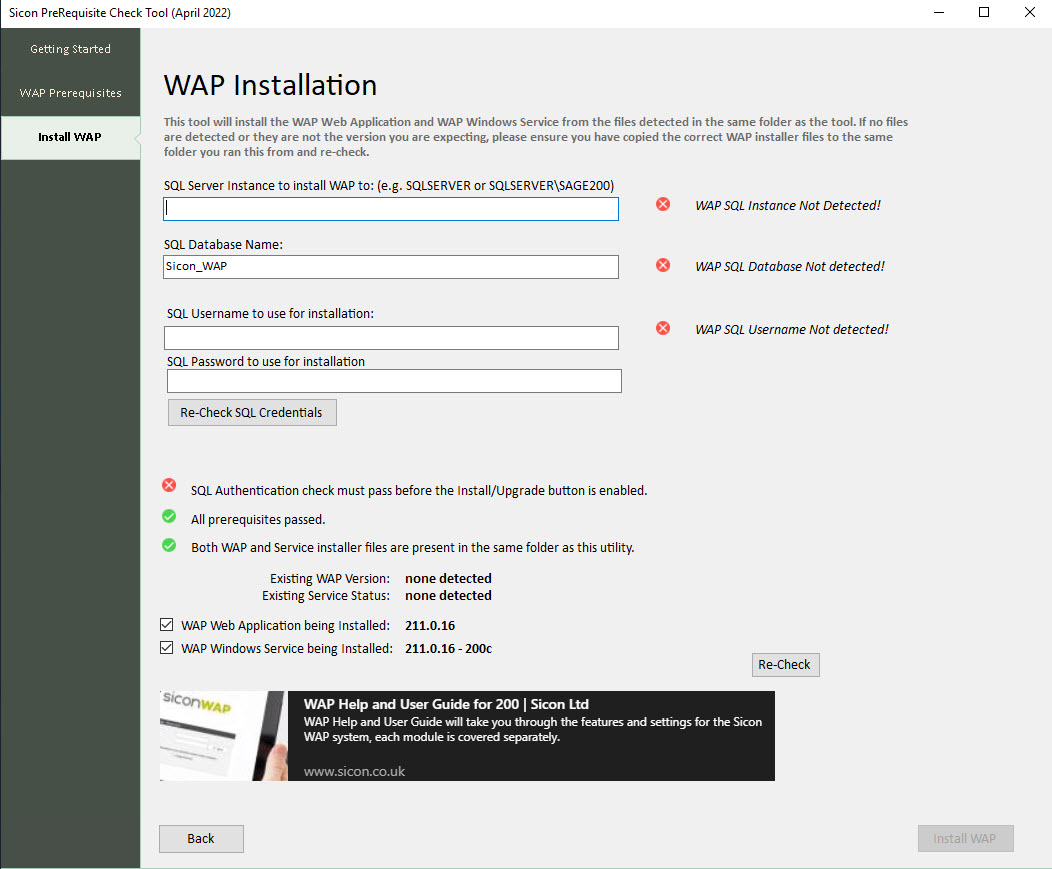
Enter the SQL instance that the WAP database will be stored on. This is typically the same as the Sage 200 database location:
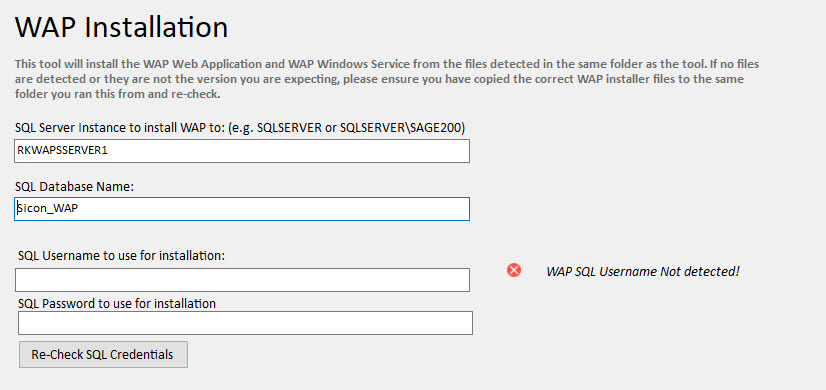
Once the credentials have been entered, click re-check SQL Credentials. If the installer can detect these it will enter them into the SQL Username and password boxes:
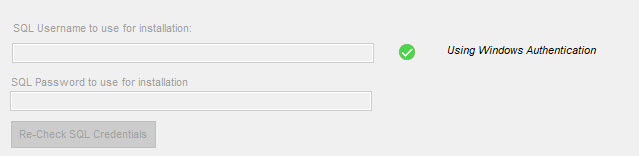
Otherwise, these can also be entered manually.
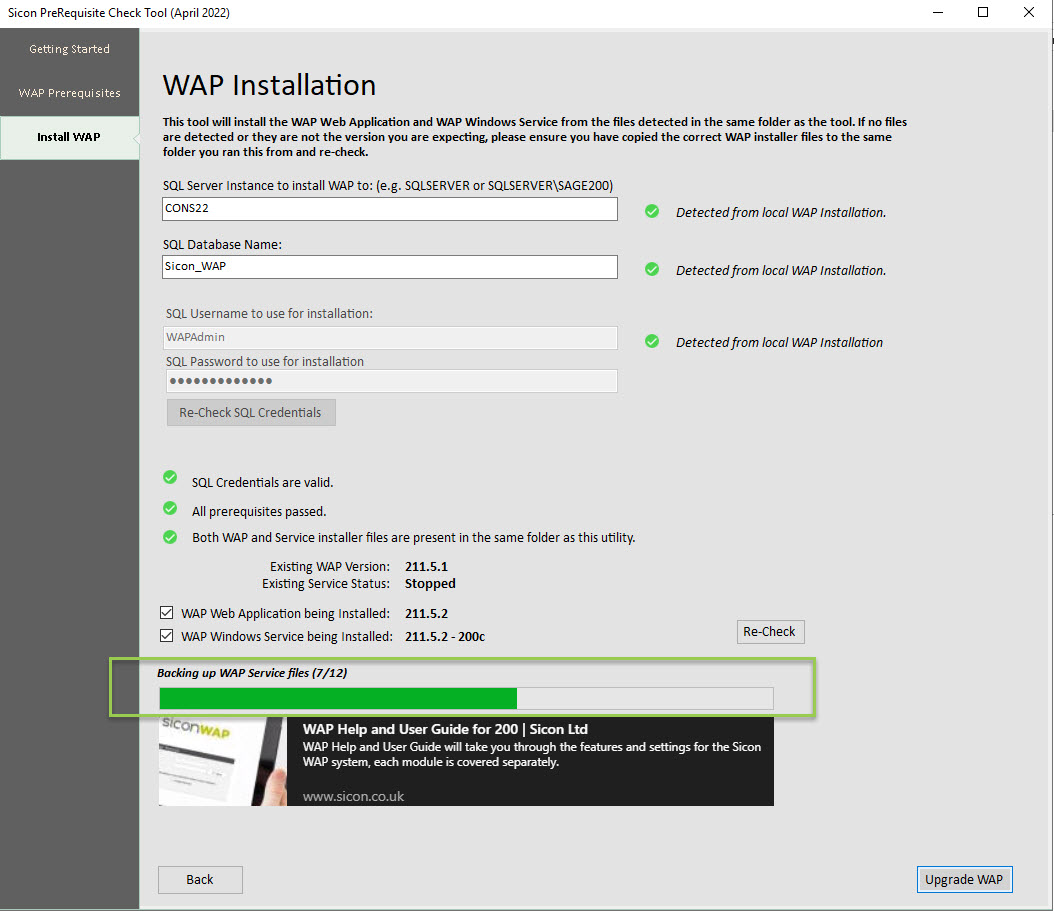
Once all sections of this screen have been completed and green ticks are showing everything is valid, then click ‘Install WAP’ to begin the automatic install process:
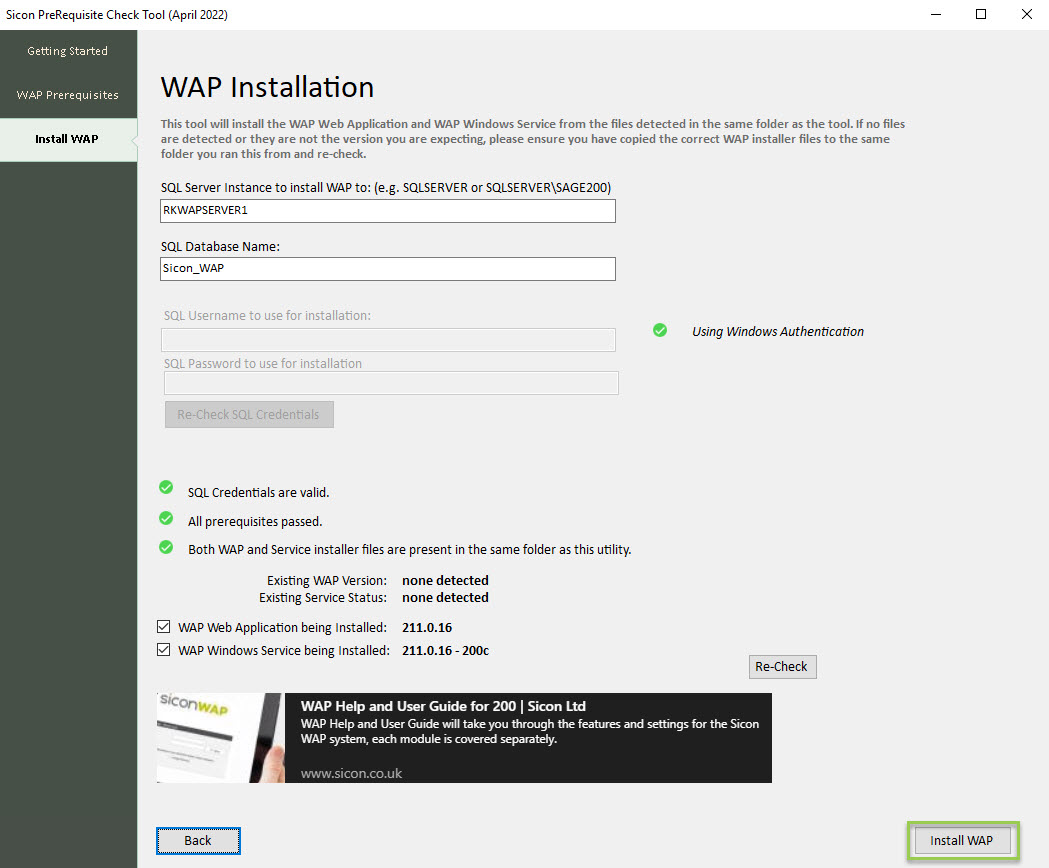
The installer will show progress updates:
Once the install of the Application and Service is completed, a popup will appear to confirm this, and a new WAP icon will appear on the desktop:
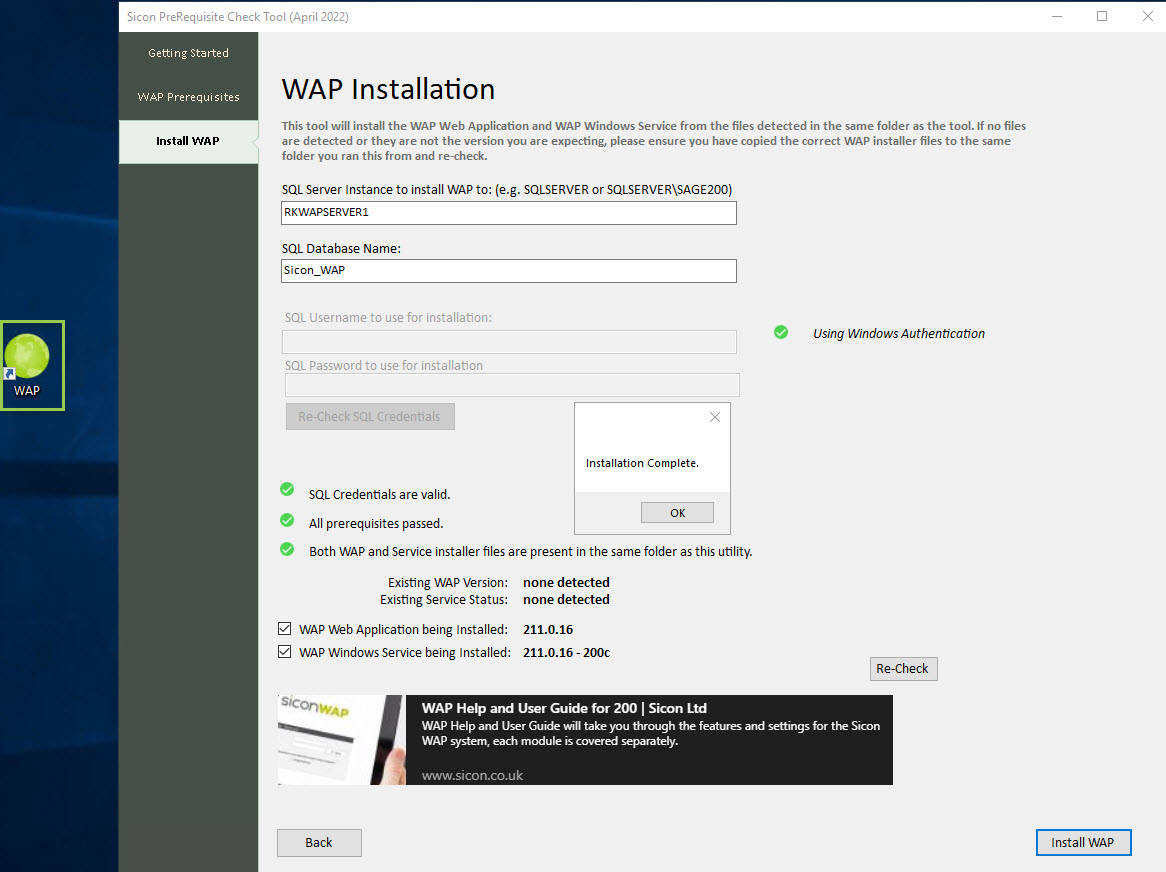
Click ok and move onto the ‘Running the Initial WAP Setup Wizard’ section of this guide.
2.7. Installing the WAP Web Application Manually
If the pre-requisite installer in the last step has been used, this step can be ignored. Move onto ‘Running the Initial WAP Setup Wizard’.
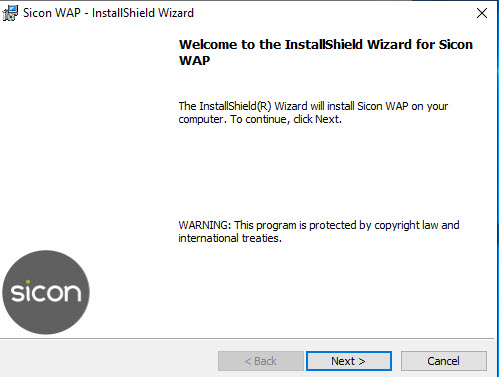
Run the webapplication.exe installer.
Press next upon accepting the Sicon License agreement.
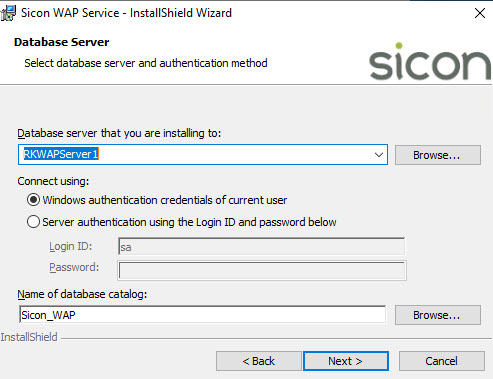
The next step will be to select the SQL instance to store the WAP database – this is typically the same location that the Sage database is stored.
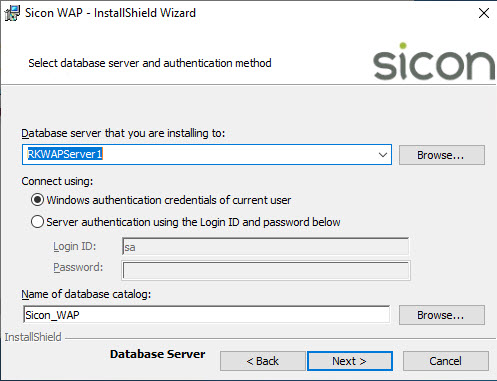
Click Next to proceed.
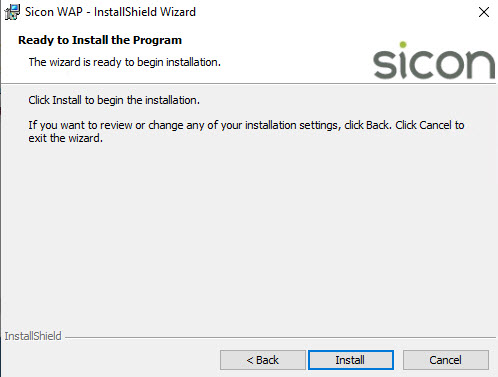
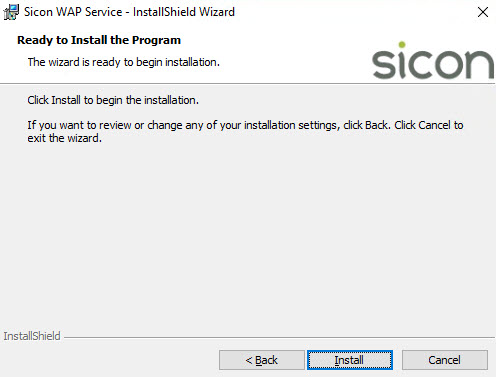
Press Install to complete installing WAP using the settings provided and once complete, press Finish to close the installer.
2.8. Installing the WAP Service Manually
If the pre-requisite installer has been used, this step can be ignored. Move onto ‘Running the Initial WAP Setup Wizard’.
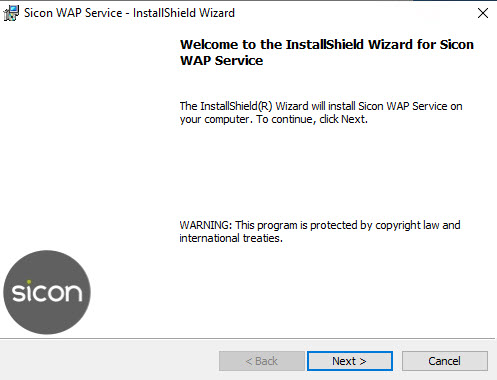
From the folder with the install files, run the Service installer.

Press next upon accepting the Sicon License agreement.
Enter the same SQL details as used for the initial WAP installation. Click Next to proceed.
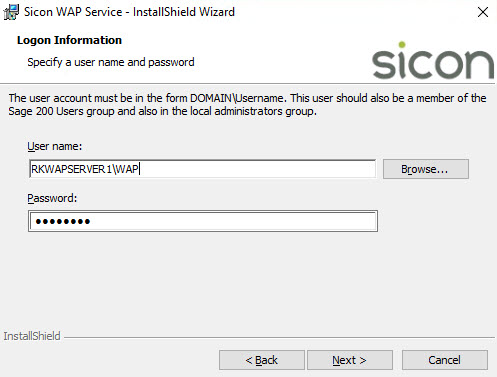
Enter the details of the WAP user created previously. Click Next to proceed.
Complete installation.
2.9. Running Initial WAP Setup Wizard
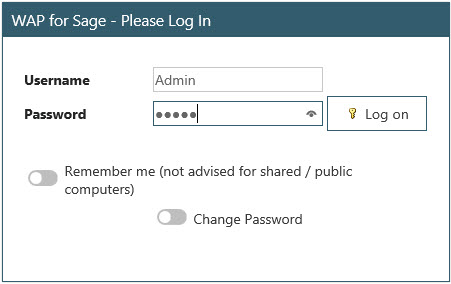
Open the WAP icon from the desktop (this will appear once the Web Application has been run). Loading this page for the first time can take a long time to load initially which is completely normal as the website builds for the first time. The only user configured will be the admin user and the password can be changed if required:
After logging in successfully for the first time, the Setup Wizard will assist with configuring the final stages of the install.
WAP Licence
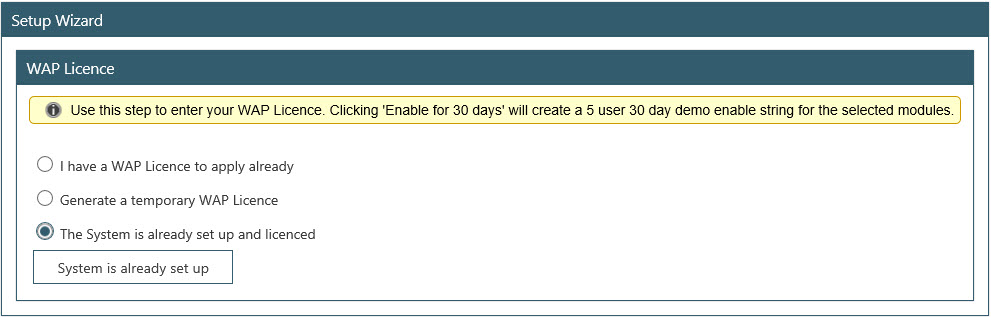
The first screen is for applying the licence and three options are available:
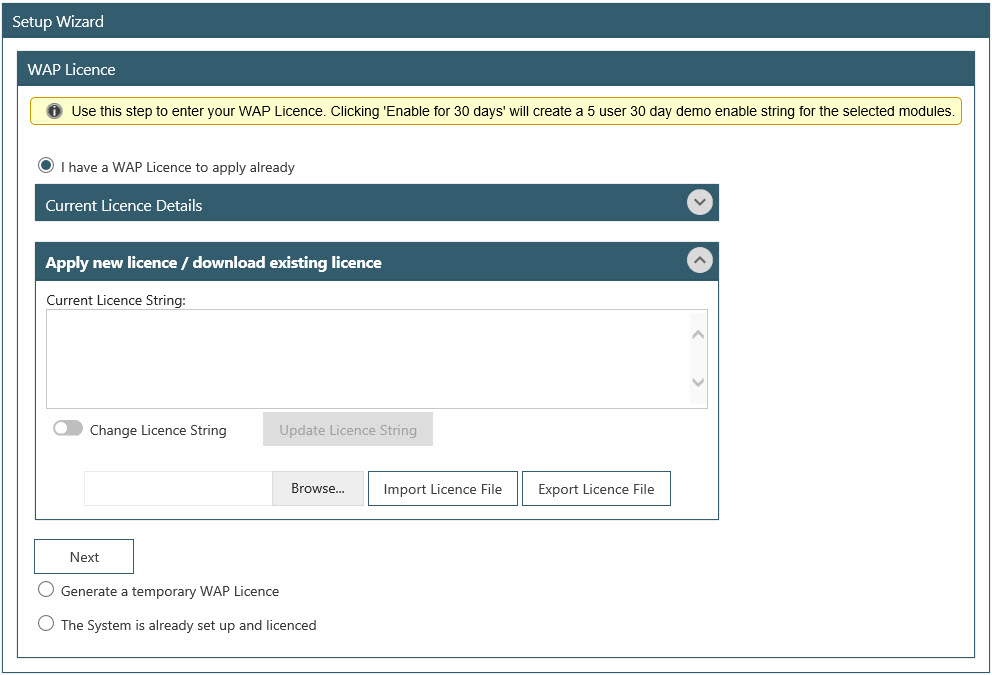
- I have a WAP Licence to apply already (for existing sites)
- Generate a temporary WAP licence (recommended option)
- The system is already set up and licenced (for existing sites who have already gone through the wizard)
Further details on each follow:
I have a WAP Licence to apply already
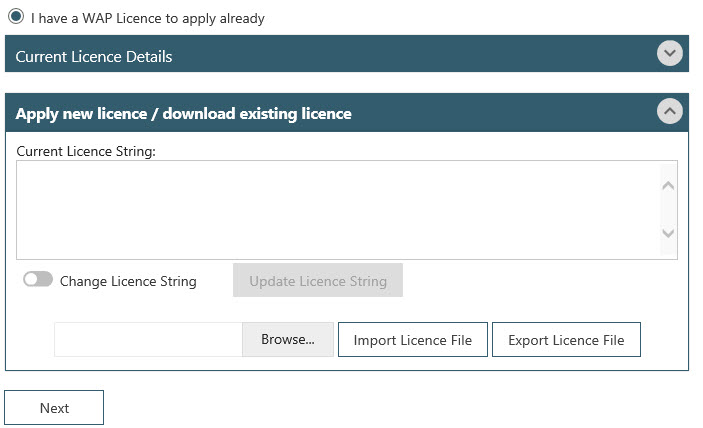
Sicon moved to an online licencing model for WAP when version 20 was released, and therefore this would not usually be required for a new install. Only select this if an enable string has been issued and click next to continue to the next stage of the setup wizard.
Generate a temporary WAP Licence
This is the recommended option for new installs since introducing Online licencing.
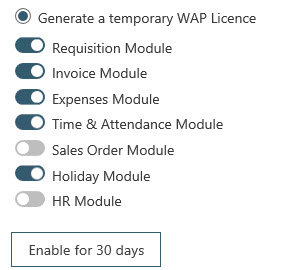
Select the modules that are relevant to the site. The online licence will be re-checked at the point of starting the WAP service and override the temporary string enabled at this step. Click ‘Enable for 30 days’ to continue to the next stage of the setup wizard.
The System is already set up and licenced
Only select this if the customer is already live and WAP has already been configured previously. Clicking ‘System is already set up’ will exit the install set up wizard which could result in missing some key set-up for new customers.
Miscellaneous Settings
Once the licence has been applied, enter the location for the WAP Docs that was created earlier:
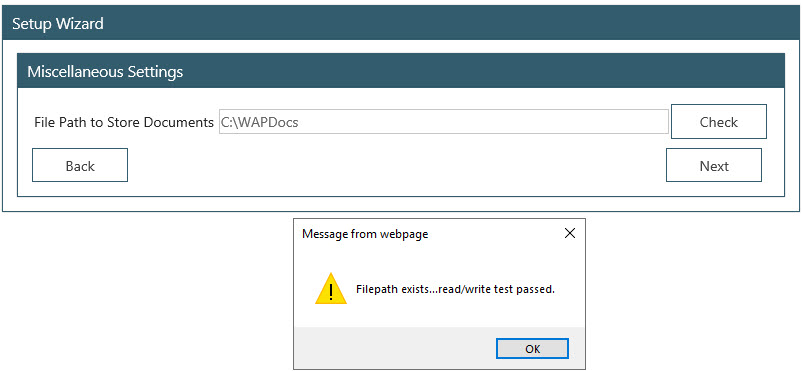
Click on ‘Check’ to ensure it is accessible for WAP.
Please note: if the WAP Documents folder is stored somewhere other than the root of the data drive, ensure that the user running the Sicon_WAP Application Pool (in IIS) has full permissions for this folder, otherwise the Check may fail.
The wizard will be complete and take the user to the Sage Connections screen ready to link the Sage Database to WAP. Move onto ‘Linking a Sage Database to WAP’.
2.10. Linking a Sage Database to WAP

WAP will work across multiple companies but must be linked to one company to allow for further configuration. Until this is done and the install competed, it will be normal to see warning messages that the Service is not running and no system base currency has been selected. These will be resolved once the install has been fully completed.
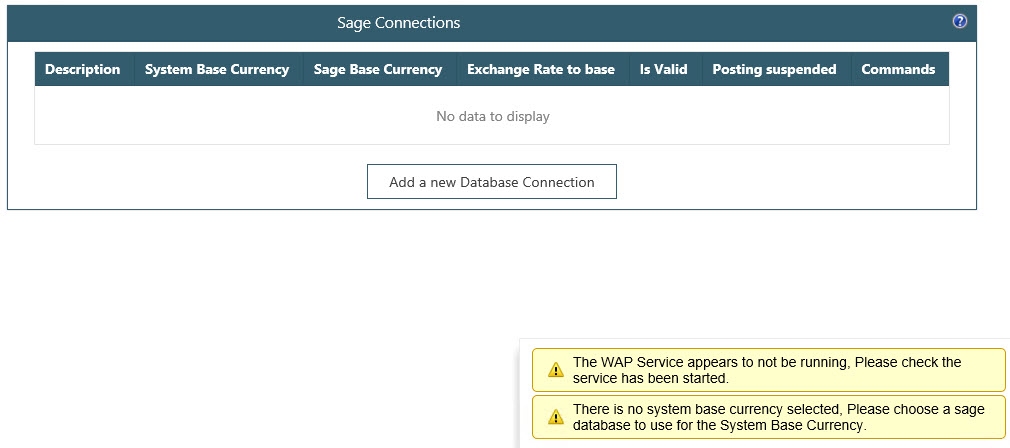
Click ‘Add a new database connection’ and enter the details of the company to add.
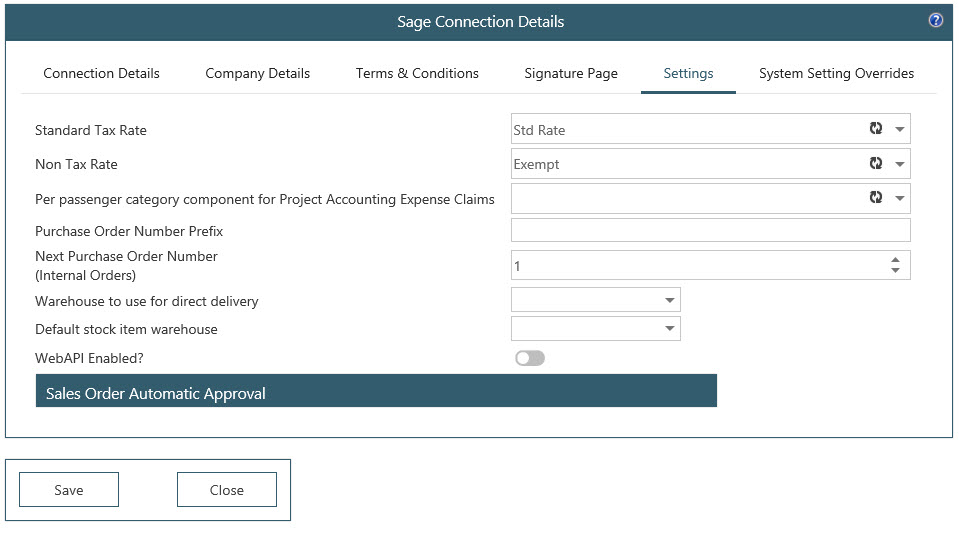
Copy the Company Description from Sage System Administration and choose the SQL server and database the company belongs to. Leave the Integrated Security unchecked and the leave the SQL Username and Password as the default.
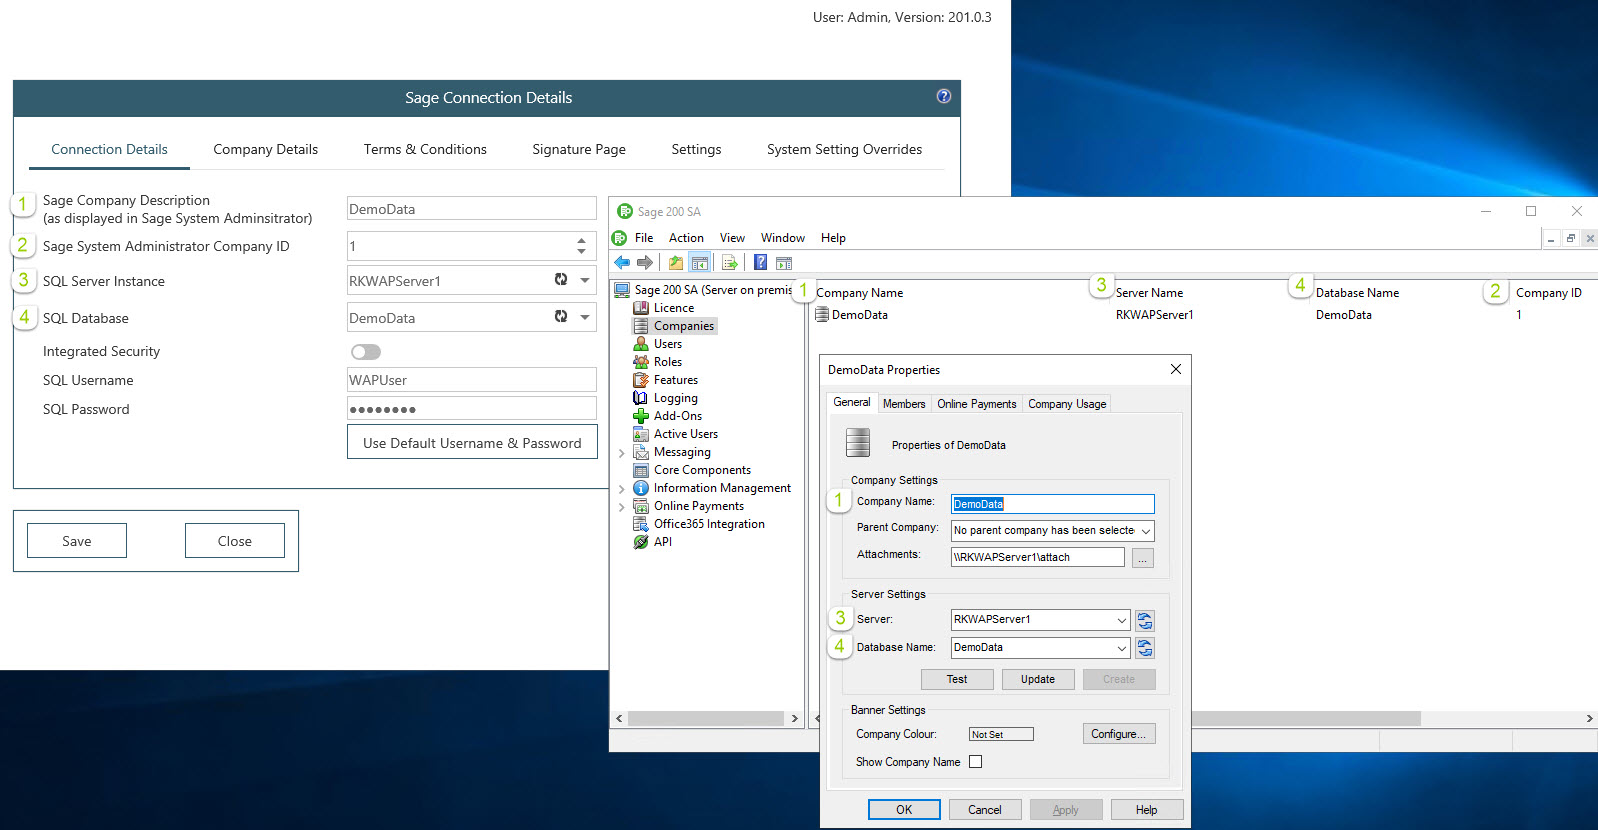
Ensure under the Settings tab a default standard and zero tax rate have been configured. The Sage database cannot be saved until this is done.
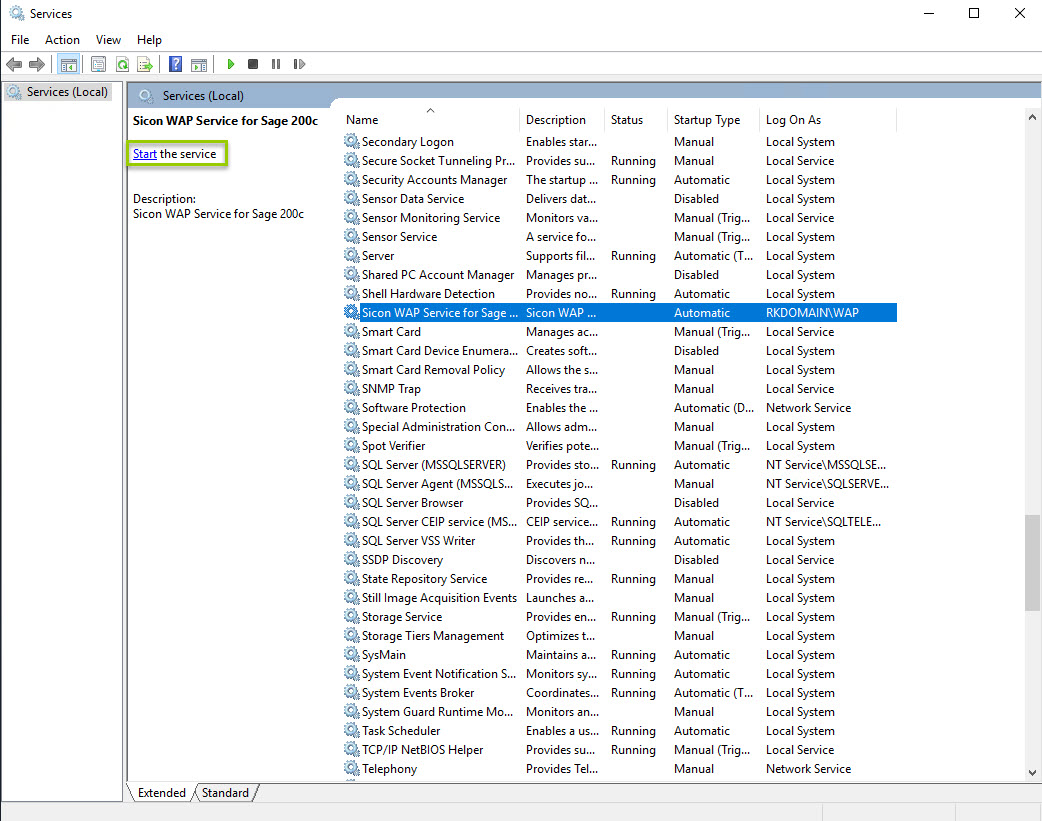
2.11. Start WAP Service
Once the install is complete, the WAP Service must be started through Services.
Once started, check the Event Viewer to make sure that the service has started and there are no errors being logged in the Sicon applications and services log:
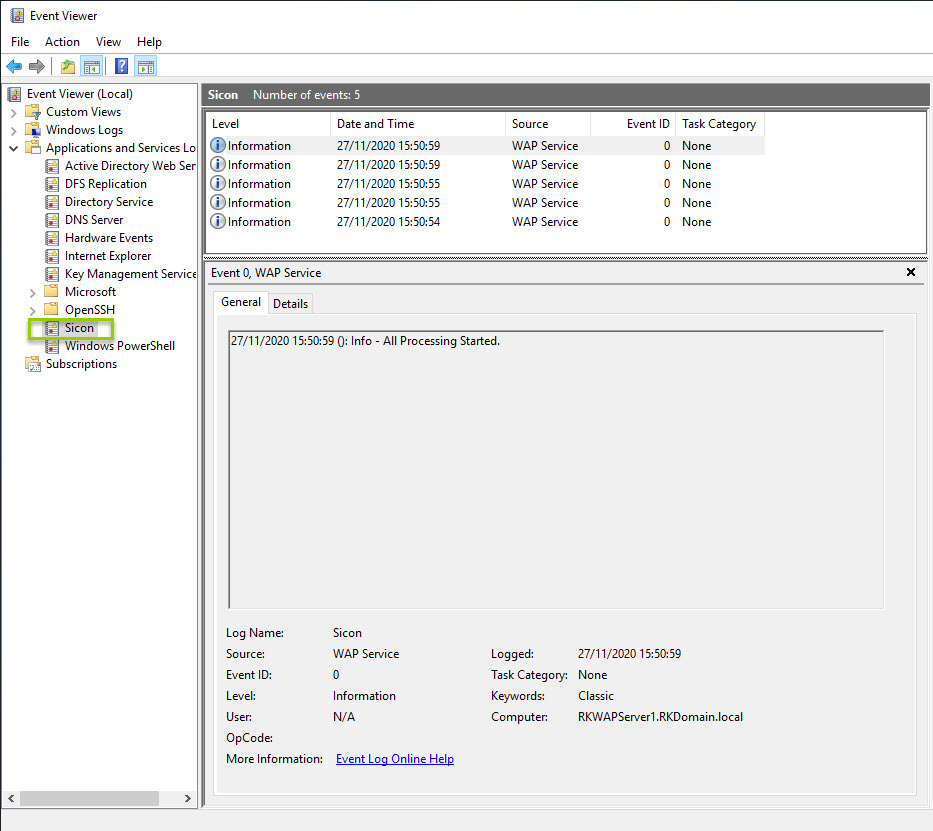
Once this has been done, upon logging back into WAP, the warning messages displayed after running the initial WAP setup wizard will now have been resolved.
This completes the basic installation of WAP ready for the configuration of users, approval routes and any other enabled modules.
3. Single Log On and Windows Authentication
Changing to or setting up Windows Authentication with Sicon WAP:
All users should be logged out of WAP when configuration takes place. If not, any users in WAP will be logged out of WAP when the IIS settings are changed.
- Within WAP, either amend a username (if user already created) or create the WAP username to match the Windows AD username. Do not delete a user and set up again. WAP routings work from a User ID so amending a username will not cause any issues. It is recommended that usernames are set up or changed first, prior to the IIS setting being configured.
- The WAP site in IIS should be configured as below. The WAP site will be able to detect the Windows username on the login page and once it has this, will query the WAP database for a user record with the same username (excluding domain). If found, it will then log in as that user automatically.

4. WAP Updates - Hotfixes & Upgrades
4.1. Hotfix vs Upgrade Definitions
Hotfix: the process of updating WAP with a new build of the existing version of WAP.
For example, the customer may be on 220.0.1 of the desktop software and a hotfix to version 220.0.2 needs to be applied. This is usually to resolve an issue in the software.
Upgrade: the process of updating WAP to a new major release of WAP.
For example, the customer may be on 211.0.1 of the desktop software and an upgrade to version 220.0.1 needs to be applied. This is usually to access newer features in the software.
Regardless of whether a hotfix or upgrade is required, the same process is followed to update WAP. However, new features and important information must always be reviewed before applying any major version upgrades.
4.2. Update Checklist
The following steps are designed as a prompt for Business Partners who have shadowed a WAP update previously. Many of these steps are also covered in more detail in the earlier section in this guide that covers Installing WAP.
When updating WAP, the Sicon Addon modules in Sage must also be updated at the same time. Users should be out of Sage and WAP when updates take place.
Additional notes and tips
Prior to updating WAP, it is recommended to either:
- Remote to the server and then try and log in using the credentials for the WAP service user.
- Run Notepad as a different user (right-click), and use WAP service user credentials to ensure it can be opened.
If this fails, it is likely the WAP service username and password provided are incorrect and the install will fail, so obtain the correct credentials before continuing.
*Optional steps
If for any reason it is not possible to upgrade WAP from the pre-requisite tool, stop the WAP service and uninstall the WAP service and applications. Then re-install using the WAP installer files directly, as outlined in sections 2.7 and 2.8 respectively (Installing the WAP Web Application and Installing the WAP Service).